Pumpkin Pie

Preparation time: 30 minutesCooking time: 70 minutes
Serves: 10Difficulty: Moderate

Ingredients

For the crust:

  • 90g/3oz/6 full tablespoons of cold butter, cubed
  • 200g/7oz/1½ cup of plain flour
  • 1½ tablespoons of sugar
  • A heaped teaspoon of salt
  • 60ml/just over ½ dl/⅒ pint/¼ cup iced water

For the filling:

  • 400g/14oz/just over 1½ cups of puréed pumpkin
  • 400g/14oz/1⅓ cups of condensed milk
  • 3 eggs
  • 1 tablespoon of cornflour
  • 1 teaspoon of cinnamon
  • ¼ teaspoon of cloves
  • ½ teaspoon of ginger
  • ½ teaspoon of nutmeg
  • ½ teaspoon of salt

For the topping:

  • Whipped cream

Make it vegan: use a block of vegan butter, and replace the eggs with ¾ cup of puréed silken tofu. Use a vegan condensed milk like Carnation Vegan Condensed Milk or Nature’s Charm Vegan Condensed Milk, both of which are available in some supermarkets and health stores. If you aren’t able to get hold of either, you could try making your own vegan condensed milk. Similarly, use vegan whipping cream.

Special Equipment

  • A 20cm pie tin
  • A blender
  • A whisk
  • A rolling pin
  • A large mixing bowl
  • Aluminium foil

Method

  1. Prepare the pastry by pulsing the flour, sugar and salt together in a blender. Add the butter and continue to pulse until the mixture resembles breadcrumbs.
  2. Add half of the water to the blender and continue to pulse until the mixture forms a ball of dough- if it looks too dry, add the rest of the water.
  3. Transfer the dough to a mixing bowl and refrigerate for about half an hour.
  4. Preheat the oven to 200°C/400°F/Gas Mark 6.
  5. Lightly whisk the eggs in a large mixing bowl. Add the puréed pumpkin to the eggs and whisk them together, then add the milk and spices. Make sure everything is whisked together thoroughly.
  6. Remove the pastry dough from the fridge and use a rolling pin to roll it out on a floured surface into a large circle.
  7. Gently wrap the pastry around the rolling pin and transfer it to the pie tin. Use it to line the tin, smoothing it down in places, trimming any overhang and, if desired, crimping the edges, so it looks as neat as possible.
  8. Fill the pastry with pie weights and bake blind for ten minutes.
  9. Remove it from the oven and take out the pie weights. Pour the pumpkin mixture into the pastry and return to the oven.
  10. Bake the pie for an hour, until the filling is almost set- it should be quite firm on the outside but still a little wobbly underneath. Turn the pie occasionally while it’s cooking and check up on it regularly- it’s likely you will need to cover the pastry with aluminium foil while the filling finishes cooking to stop the pastry burning.
  11. Remove the pie from the oven and allow it to cool before serving.
  12. When ready, cut into slices and serve with whipped cream. Bon Appetit!

Tips

  • The pie should be ready after it’s been in the oven for about an hour, even if the filling still looks a little wobbly in the middle. It should firm up as the pie cools.
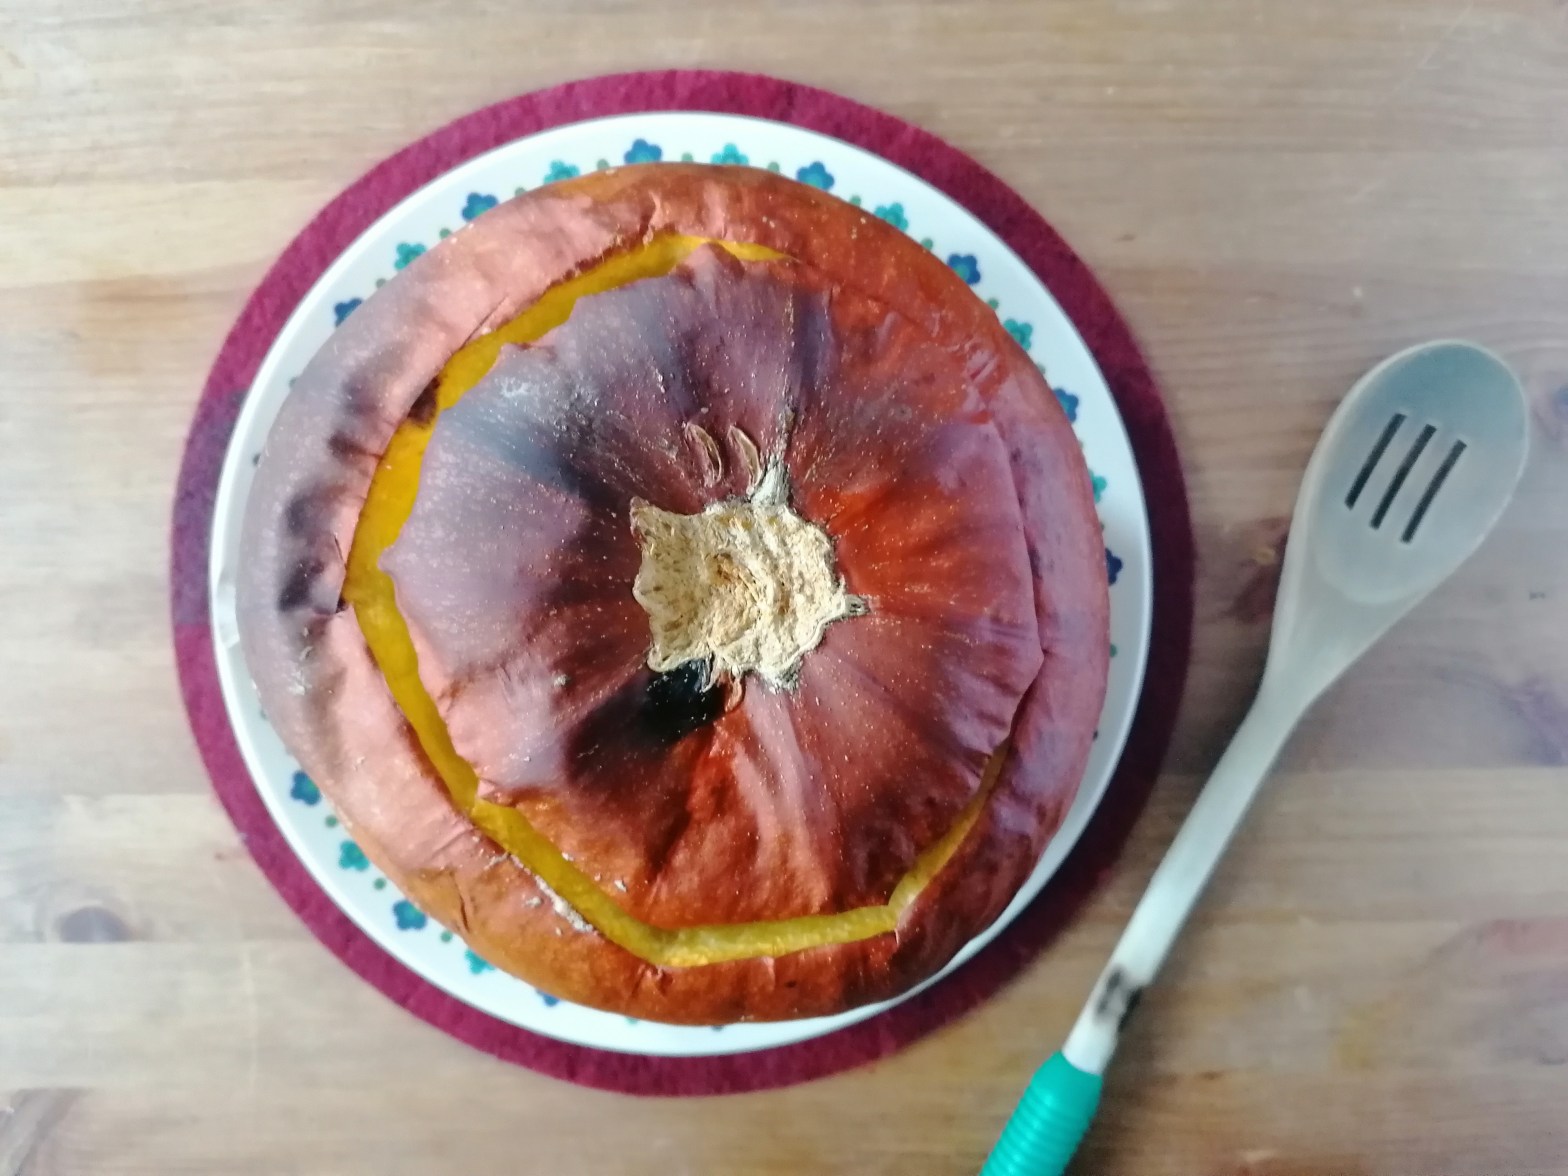
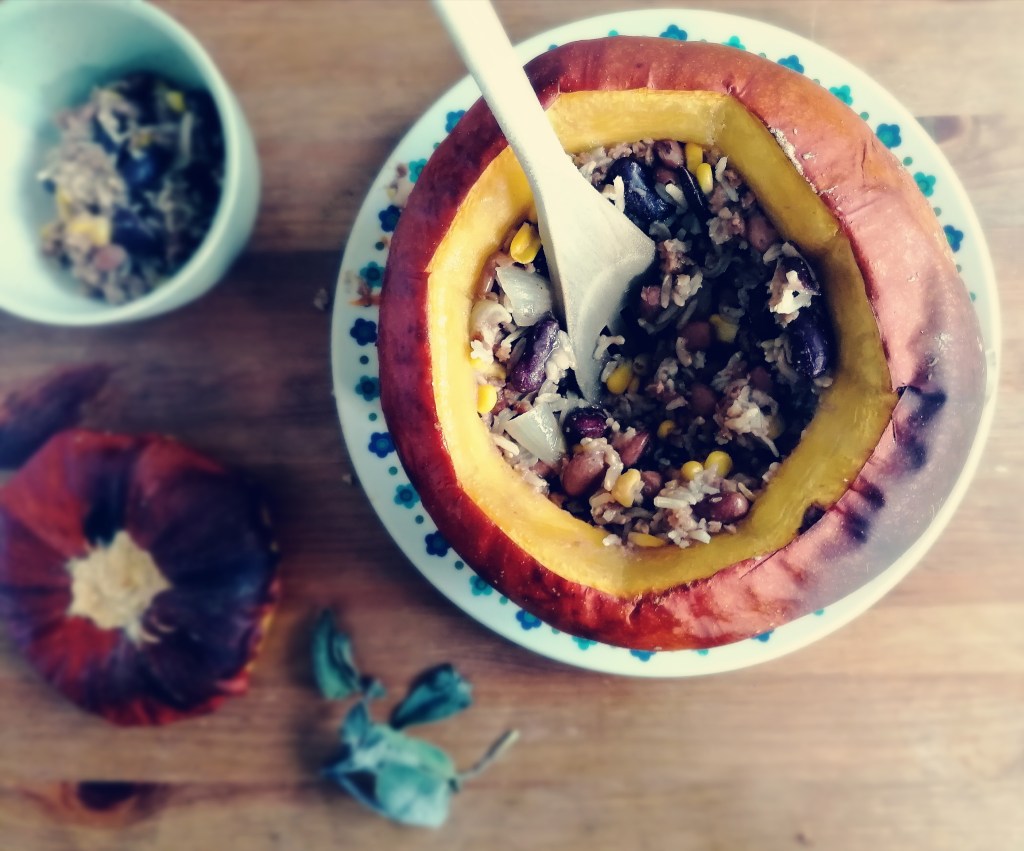
  • If you can’t get ahold of pre-puréed pumpkin, you can make your own by removing the seeds and skin from a pie pumpkin and steaming the flesh for 20 minutes. Allow the flesh to cool then blend it up in a food processor. When ready, weigh out 400g and mix in with the eggs, milk and spices as above.
  • Keep a close eye on the pie when it’s cooking as the pastry can burn quite easily. It’s likely you will need to wrap some aluminium foil around the pastry while the filling finishes cooking.

Background

Home: U.S.

Relatives: Sweet Potato Pie (Southern U.S.), Egg Custard (UK), Bean Pie (U.S.), Bundevara (Serbia)

History

Infrogmation of New Orleans, FrenchMarketPumpkinsB, 2008
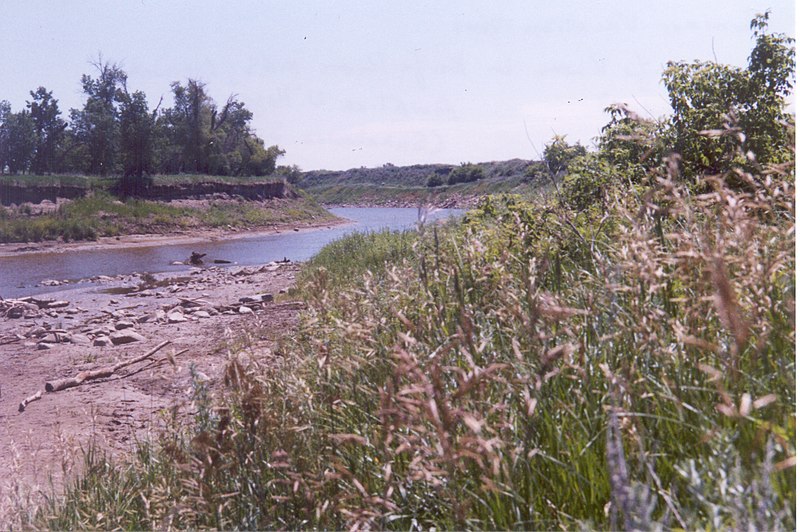
https://commons.wikimedia.org/wiki/File:FrenchMarketPumpkinsB.jpg [accessed 23/10/2020] (https://creativecommons.org/licenses/by-sa/2.0/deed.en)

Early European settlers in New England were first introduced to pumpkins by Native American groups, who brought them various squashes as gifts to help them make it through the winter. The settlers are believed to have made an early version of Pumpkin Pie by hollowing the pumpkins out and filling them with custard before baking them in hot ash.

The earliest known recipes for Pumpkin Pie appeared in a French cookbook, Le Cuisinier François, by Francois Pierre la Varenne, in 1651, and in an English cookbook, The Gentlewoman’s Companion, by Hannah Woolley, in 1675. The English version contained herbs and apples, and was very different to modern Pumpkin Pie! The first known American recipe appeared in American Cookery, by Amelia Simmons, in 1796. Simmons’ recipe was closer to modern Pumpkin Pie: the creamy custard filling was spiced and came in a pastry shell.

Pumpkin Pie became politicized in the 19th century. The dish was heavily associated with its birthplace, New England, which was the home of many abolitionists; it was much less popular in southern states where slavery was practiced. The dish had become an important part of the American Thanksgiving Dinner and when, during the Civil War, Thanksgiving was declared a national holiday, some southerners considered both the holiday, and Pumpkin Pie, to be a northern cultural imposition and refused to partake. However, enslaved African Americans in the south had their own version of Pumpkin Pie: Sweet Potato Pie, which was popular at social gatherings and parties.

Toffee Apples

It only takes 30 minutes to make a batch of crunchy, chewy fairground style Toffee Apples- and it’s surprisingly easy!

Preparation time: 10 minutesCooking time: 20 minutes
Serves: 8Difficulty: Moderate

Ingredients

  • 8 small apples
  • 400g/14oz/2 cups of granulated sugar
  • 2 teaspoons of white wine vinegar
  • 120ml/1⅕dl/⅕ pint/½ cup of water
  • 1 teaspoon of red food coloring (optional)

Special Equipment

  • A small stainless steel saucepan
  • 8 sticks (lollipop sticks or small kebab skewers)
  • A sugar thermometer

Method

  1. Line a baking tray with baking paper. Wash the apples, remove the stems, and insert a lollipop stick into the top of each apple.
  2. Pour the sugar, water and vinegar into the saucepan and stir everything together. Pop the saucepan over a high heat and bring the mixture to the boil. Then reduce the hob temperature to medium and allow it to simmer for about 18 minutes.
  3. Do not stir the syrup at all while it’s simmering, but keep a close eye on it. If you think it’s in danger of burning lower the temperature.
  4. After 18 minutes, insert a sugar thermometer into the syrup to test the temperature. It needs to be at the ‘hard crack’ stage- which it reaches between 146 to 154°C, or 295 to 309°F. If you don’t have a sugar thermometer, you can test the syrup by dropping a spoonful of it into a glass of very cold water. It’s reached the ‘hard crack’ stage if, when it hits the water, it forms hard, brittle threads that snap if you try to bend them. If it isn’t ready, allow it keep simmering and keep testing the temperature every other minute until it’s ready.
  5. Remove the syrup from the heat and stir in the food colouring.
  6. Wait half a minute, then start dipping the apples in the saucepan, rotating them in the syrup to ensure they get an even coverage.
  7. Allow each apple to dribble a little excess syrup back into the saucepan, then place them on the baking paper and allow them to cool.

Tip

  • Make sure you keep a very close eye on the syrup while it’s cooking, as sugar burns very, very easily. Keep checking on it every couple of minutes to ensure it doesn’t burn, and if it isn’t ready after it’s simmered for 18 minutes, test it every other minute until it’s done.
  • Make sure you use vinegar in the syrup, that the saucepan is very very clean, and that you don’t stir the syrup while it’s simmering- if you don’t do all three the sugar might crystalize instead of caramelizing.
  • After removing the syrup from the hob, wait half a minute before you begin dipping the apples. If you’d prefer them to look bubbly, start dipping them right away.

Background

Home: New Jersey, USA

Relatives:  Caramel Apple (U.S.), Lollipop (U.S.)

History

Candy Apples, which are known as Toffee Apples in Commonwealth English and as Pommes d’Amour in Francophone countries, were invented by William Kolb in 1908. Kolb was a confectioner from New Jersey, and actually invented Candy Apples by accident whilst experimenting with a new recipe for hard red cinnamon candy, which he wanted to display in his shop window to attract new customers at Christmas.

Kolb opted to showcase the vibrant red candy by dipping apples in it and displaying them- but passersby were more interested in buying the candy dipped apples than the candy itself. Kolb promptly ramped up production of Candy Apples and sold them by the thousand. They soon became popular across the state and later, throughout the country and abroad.

Candy Apples, being bright red and, at least initially, cinnamon flavoured, were originally a Christmas treat. But over time they became more associated with Halloween- possibly because apples are more in abundance in autumn than at Christmas. However their popularity at Halloween subsided somewhat in the 1970s, when there was a national scare about contaminated candy apples being given out to unsuspecting trick or treaters. These rumours were found to be unsubstantiated and Candy Apples have since made a Halloween comeback! In the UK, they continue to be eaten at Halloween but are most popular 5 days later, on Bonfire Night.

Stuffed Sugar Pumpkin

This hearty and healthy Hidatsa recipe is great for cold autumn evenings.

Preparation time: 30 minutesCooking time: 90 minutes
Serves: 8Difficulty: Moderate

Ingredients

  • A 2.2kg/5lb/medium sized sugar pumpkin
  • 2 teaspoons of salt
  • ½ teaspoon of dry mustard
  • 2 teaspoons of rendered fat or oil
  • 450g/1lb/2 cups of ground buffalo or venison
  • A wild onion, chopped
  • 170g/6oz/1 cup of sweetcorn
  • 250g/9oz/1 cup of kidney or pinto beans
  • 300g/11oz/1 cup of cooked wild rice
  • 3 large eggs
  • 2 teaspoons of chopped sage (or 1 teaspoon of dried sage)
  • ½ teaspoon of black pepper

Make it vegan: replace the buffalo with plant based mince, chopped mushrooms or extra beans, and replace the eggs with 3/4 cup of puréed silken tofu.

Special Equipment

  • A sharp knife
  • A large saucepan
  • A large baking dish

Method

  1. Preheat the oven to 180°C/350°F/Gas Mark 4.
  2. Use a sharp knife to cut the top off the pumpkin, then remove the strings and seeds. Prick the pumpkin cavity with a fork before rubbing it with the mustard and half of the salt.
  3. Place a large saucepan over a medium-high heat. Pour in the oil and allow it to heat up for a few minutes before adding the meat and onion. Sauté both for a few minutes until they’re nicely browned, then stir in the corn and beans and cook for a further minute.
  4. Remove the pan from the heat and stir the wild rice, eggs, sage, pepper and remaining salt into the meat. Then pour the meat mixture into the pumpkin and replace the lid.
  5. Place the pumpkin in a baking pan and pour in half an inch of water. Bake the pumpkin for about an hour and a half, or until it’s tender. Rotate it once or twice while it’s cooking so it doesn’t burn on one side, and if the water begins to evaporate, add more water to the pan.
  6. Remove the pan from the oven and, using oven gloves, place the pumpkin on a serving dish. Cut it into wedges. Serve each person a wedge with some stuffing.
  7. Bon Appetit!

Tips

  • Use a sugar or pie pumpkin for this recipe- not a decorative Halloween pumpkin, which won’t taste as good.
  • After you remove the pumpkin seeds, you don’t have to throw them away! Wash them before roasting them with paprika, salt and pepper to make a healthy, tasty snack.

Background

Home: North Dakota

Other Native American dishes with squash: Choctaw Stew (Choctaw), Ogwissimanabo (Tuscarora), Three Sisters Stew

History

Pumpkins originated in Central America over 7,500 years ago. These ancient pumpkins were small, hard and bitter- with little resemblance to the large, sweet pumpkins we eat today- but they were easy to store for winter, so were widely cultivated.

Modern Squash Varieties
Californiacondor, Squashes, 2006 https://commons.wikimedia.org/wiki/File:Squashes.jpg [Accessed 09/10/2020] (https://creativecommons.org/licenses/by-sa/3.0/deed.en)

Different Native American groups from across the Americas favoured different parts of the pumpkin. Many groups from what would today be parts of Mexico and the southern U.S. enjoyed pumpkin seeds, which were sometimes believed to give the consumer energy and endurance. The Cocopa tribe of modern Arizona believed the seeds gave them protection against the cold, while the O’odham ground them down to make bread flour.

Other southern groups preferred the flesh of the pumpkin. The Diné fried it with mutton and the Taos Pueblo combined it with corn and onion to make Succotash. Variations of mashed, boiled and roasted pumpkin were popular across the continent, and some groups would also dry leftover pumpkin flesh before weaving strips of it to make mats.

Stuffed Sugar Pumpkin is a Hidatsa recipe. The Hidatsa are an indigenous group from the Knife River in modern day North Dakota, where they have lived since at least the 13th century. Over the centuries the Hidatsa became skillful farmers. They opted to grow crops on the fertile lands around the river, which they scattered with ashes from cleared brush to provide the soil with extra nutrients.

The Knife River, North Dakota
Chris Light, Stantan North Dakota Knife River Village south to the village, 2001 https://commons.wikimedia.org/wiki/File:Stantan_North_Dakota_Knife_River_Village_south_to_the_village.jpg [accessed 09/10/2020] (https://creativecommons.org/licenses/by-sa/3.0/deed.en)

Buffalo Bird Woman (Maaxiiriwia, also known as Waheenee), a Hidatsa farmer, described this practice in Buffalo Bird Woman’s Garden: Agriculture of the Hidatsa Indians, a doctoral dissertation and book by Gilbert Wilson published in the early 20th century. Hidatsa farmers like Buffalo Bird Woman also used the ‘Three Sisters’ planting method, whereby squash, beans and corn were planted together with similar crops like tobacco and sunflowers. Using this companion planting method allowed the Hidatsa to take advantage of the crops’ natural tendencies and growing relationships. By perfecting such agricultural methods the Hidatsa successfully farmed enough vegetables that they were not only able to feed themselves but trade their produce with neighbouring villages.

This Hidatsa Stuffed Sugar Pumpkin recipe is based on a recipe from Spirit of the Harvest: North American Indian Cooking, by Beverly Cox and Martin Jacobs- but I have added corn and beans, the other ‘Three Sisters’ vegetables, to complement the pumpkin.

Barmbrack

This tasty Irish tea cake is traditionally eaten at Halloween and is a perfect comfort food for cold autumnal evenings!

Fruit soaking time: 6+ hours (overnight)Preparation time: 15 minutes
Cooking time: 60 minutesServes: 10
Difficulty: Easy

Ingredients

  • 350g/12½oz/2⅓ cups of dried fruit (raisins, sultanas, citrus peel etc.)
  • 250ml/2½dl/just under ½ pint/1 cup of strong hot black tea
  • 50ml/½dl/⅒ pint/⅕ cup of whiskey
  • A little margarine, for greasing
  • 225g/8oz/just under 2 cups of plain flour
  • 2 teaspoons of baking powder
  • ½ teaspoon of nutmeg
  • ½ teaspoon of cinnamon
  • 110g/4oz/½ cup of brown sugar
  • 1 egg
  • 1 tablespoon of lemon zest
  • A trinket like a ring or coin (optional)

Make it vegan: use vegan margarine for greasing instead of butter and use a flax egg (made by combining a tablespoon of ground flaxseed with 3 tablespoons of water) or three tablespoons of aquafaba instead of the egg.

Special Equipment

  • Two large mixing bowls
  • A medium sized bread tin or round cake tin
  • Baking paper

Method

  1. Place the dried fruit in a large mixing bowl and pour over the tea and whiskey. Cover the bowl with a teatowel and leave the fruit to soak overnight.
  2. Preheat the oven to 170°C/340°F/Gas Mark 3. Prepare a bread or cake tin by greasing a large sheet of baking paper and using it to line the tin.
  3. Sieve the flour, baking powder and spices into a large mixing bowl before mixing in the sugar with a wooden spoon.
  4. Pour the egg and the liquid from the dried fruit mixture into the large mixing bowl and stir them into the flour mixture. Finally, add the lemon zest, dried fruit and trinket (if using) to the bowl and stir everything together.
  5. Spoon the mixture into the prepared tin and pop it in the oven. Bake the Barmbrack for about an hour, turning at least once during cooking time. It’s ready when it’s golden brown and a fork inserted into the Barmbrack comes out clean. Remove it from the oven and allow it to cool before serving.
  6. Bain taitneamh as do bhéile!/Bon appetit!

Tips

  • For best results, leave the dried fruit to soak overnight (or for a minimum of six hours) before adding them to the Barmbrack mixture.
  • Eat the finished Barmbrack with butter and a cup of hot tea. If desired, you can toast it first.

Background

Pronunciation: /ˈbɑːmbrak/ (bahm-brak)

Home: Ireland

Relatives: Bara Brith (Wales), Malt loaf (United Kingdom), Tea loaf (England)

History

The Irish forerunner to Halloween is Samhain (pronounced sau-inn), a Gaelic festival which has been celebrated since ancient times.

Like Halloween, Samhain has always been held around October 31st. Halfway between the autumn equinox and the winter solstice, this date marked the end of the harvest season and the beginning of winter. And like Halloween, Samhain was a time when the doorways between our world and the otherworld were said to open, so spirits were able to freely cross over from the other side.

These spirits included the Aos Sí (faeries), who took the opportunity to cause mischief and damage crops, as well as the souls of the dead, who were said to return to visit their homes and families.

The Aos Sí were placated with sacrifices and offerings of food and drink, while the souls of the dead were welcomed home and offered a place at the dinner table. People would also dress in costumes and go door to door, seeking food and hospitality, in an effort to impersonate (or attempt to scare away) spirits, and would light bonfires to hold back the darkness of winter.

Bonfire at Samhain
Roger Griffith, Beltane Bonfire on Calton Hill, 2008
https://commons.wikimedia.org/wiki/File:Beltane_Bonfire_on_Calton_Hill.JPG [accessed 30/09/2020]

Over the centuries, as Christianity gained traction in Ireland, Samhain and All Hallows Eve (the date which precedes the feast of All Hallows’ Day on the liturgical calendar) merged together to make Halloween, which retains many of Samhain’s traditional festivities.

Divination was an integral part of Samhain. Druids would attempt to use the visiting spirits to see the future, and revelers would dance around the Samhain bonfires before returning the next morning to examine the leftover ashes and stones, using what they found to predict the future. Apple bobbing was also practiced: when a person caught an apple they would peel it and use the shape of the peel to guess the name of their future husband or wife.

Another common divination ritual involved baking a loaf of Barmbrack, or Bairín Breac (‘spotted bread.’) Certain charms (often a pea, stick, cloth, coin and ring) were hidden in the Barmbrack dough. Slices of the finished loaf were then handed out and if the recipients found a charm in theirs, it indicated what the future had in store for them: if they found a coin it meant they would become rich, and if they found a ring it meant they would soon marry.

Vispipuuro

This fruity and fluffy Finnish porridge is vegan and can be eaten for breakfast, dessert or as a snack!

Preparation time: 20 minutesCooking time: 25 minutes
Cooling time: 60 minutesServes: 3
Difficulty: Moderate

Ingredients

  • 800ml/8dl/1½ pints/3⅓ cups of water
  • 280g/10oz/2 cups of lingonberries, cranberries, redcurrants, gooseberries, strawberries, blueberries and/or blackberries
  • Pinch of salt
  • 100g/3½oz/½ cup of granulated sugar
  • 85g/3oz/½ cup of semolina

Special Equipment

  • A large saucepan
  • A sieve
  • An electric whisk
  • Serving glasses

Method

  1. Pour the water, berries, sugar and salt into a large saucepan. Set the saucepan over a high heat and bring the berry mixture to the boil. Allow it to boil for 10-15 minutes, or until the berries have begun to break down. Stir occasionally while cooking.
  2. Pour the berry mixture through a sieve into a large bowl. Discard the berries and pour the berry infused water back into the pan. Return the pan to the hob and set it over a high heat again.
  3. When the berry water begins to boil, turn the heat down to medium and pour the semolina into the pan. Allow the berry water and semolina to simmer for 5 to 10 minutes, or until the liquid is nicely thickened. Stir it regularly while it’s cooking.
  4. Remove the pan from the hob and leave the berry water and semolina mixture to cool down to room temperature.
  5. Use an electric whisk to whip up the berry water and semolina mixture. It’s ready when it’s very fluffy and has become lighter in colour- this will take at least 10 minutes.
  6. Pour the finished Vispipuuro into serving glasses and refrigerate until ready to serve.
  7. Hyvää ruokahalua!/Smaklig måltid!

Tips

  • You don’t have to remove the berries from the berry water before adding the semolina. If you leave them in the Vispipuuro will be less fluffy but much fruitier!
  • Make sure the Vispipuuro is cold before serving. If you like you can pour milk over it and garnish it with berries.
  • Vispipuuro can be eaten for dessert, breakfast or as a snack.

Background

Pronunciation: (VEES-pee-POUR-ohh)

Home: Finland, Sweden, Estonia, Norway, Latvia

Relatives: Manų Košė (Lithuania), Rødgrød (Denmark, Germany), Tejbegríz (Hungary), Helmipuuro (Finland), Guriev Kasha (Russia), Semolina Pudding (UK), Mousse (France)

History

In Finland, lingonberries are the preferred fruit for making Vispipuuro. The lingonberry shrub is resilient to cold but struggles in warmer temperatures, so it thrives in the Baltoscandian subarctic climate. Finland itself has a low population density and encompasses vast swathes of wilderness, made up of boreal forests, plateaus and hundreds of thousands of large lakes, so the country has plenty of space for wild lingonberry shrubs to grow. As a result many Finnish people are able to handpick wild lingonberries and don’t have to rely on cultivated fruits.

Lingonberries are naturally tart so they are usually sweetened with lots of sugar. They are used in jams, compotes, juices, smoothies, as well as in sauces for elk and reindeer steaks. Particular recipes made using lingonberries include Mors (a Russian drink often taken with vodka), Lingonpäron (a Swedish dessert of pears cooked in lingonberry juice), Kroppkakor (Swedish dumplings garnished with lingonberries) and Poronkäristys (Finnish sautéed reindeer with mashed potatoes and lingonberries.)

Vispipuuro itself (‘whipped porridge’) is eaten in Finland as well as in neighbouring countries. As it’s a widespread dish it’s known by many names: Lappaporru in western Finland, Klappgröt in Sweden, Mannavaht in Estonia, Uzputenis in Latvia and Russedessert in Norway. Its Norwegian name suggests Vispipuuro is of Russian origin, but its history is quite undocumented, so we don’t know for sure! Vispipuuro first made its way into Scandinavian cookbooks in the early 20th century, but is probably much, much older.

Winter in Finland
Guillaume Baviere, IIjärvi from Iivaara in winter, 2012
https://commons.wikimedia.org/wiki/File:IIj%C3%A4rvi_from_Iivaara_in_winter.jpg [accessed 24/09/2020] https://creativecommons.org/licenses/by/2.0/deed.en

Nürnberger Lebkuchen

These traditional Bavarian Lebkuchen are easy to make and perfect for Christmas!

Preparation time: 40 minutesCooking time: 20 minutes
Makes: Approx. 15 biscuitsDifficulty: Moderate

Ingredients

For the Lebkuchengewurz:

  • 3 teaspoons of ground cinnamon
  • 1 teaspoon of ground ginger
  • ¾ teaspoon of crushed cloves
  • ½ teaspoon of ground cardamom
  • ½ teaspoon of ground nutmeg
  • ½ teaspoon of ground pepper
  • ⅙ teaspoon of ground aniseed
  • ⅙ teaspoon of ground coriander

For the Lebkuchen:

  • 100g/3½oz/½ cup of butter
  • 150g/5oz/just under ½ cup of honey
  • 100g/3½oz/½ cup of caster sugar
  • 1 egg
  • 250ml/2½dl/just under ½ pint/1 cup of milk
  • 250g/10½oz/2¾ cups of plain flour`
  • 1 teaspoon of baking powder
  • 1 tablespoon of cocoa powder
  • A pinch of salt
  • 200g/5oz/1¼ cups of ground hazelnuts, walnuts or almonds
  • 40g/1½oz/½ cup of candied citrus peel

For decoration:

  • 125g/4½oz/1 cup of icing sugar
  • 200g/7oz/1¼ cups of chocolate
  • A teaspoon of flavourless oil (sunflower oil, groundnut oil etc.)
  • Whole almonds

Make it vegan: use a plant based margarine instead of butter, and use golden syrup (or a vegan honey like Honea) instead of honey. Use 3 tablespoons of aquafaba instead of the egg, and use soya, oat or almond milk instead of dairy milk. Finally, use a vegan chocolate brand for decoration.

Special Equipment

  • Two large baking trays
  • Baking paper
  • A pencil
  • A 7cm cup, ramekin or cookie cutter
  • A large mixing bowl
  • A wooden spoon
  • A sieve
  • A couple of small bowls

Method

  1. Preheat the oven to 190°C/375°F/Gas Mark 5.
  2. Line the baking trays with sheets of baking paper. Set a ramekin, cup or cookie cutter that’s about 7cm in diameter on a sheet of baking paper and draw around it with a pencil. Repeat, making sure you leave a few centimetres between each circle, until you have about 15 circles. (Depending on the size of your baking trays/oven, you may need to prepare a few extra baking sheets and cook the Lebkuchen in batches.)
  3. Make the Lebkuchengewurz by combining the cinnamon, ginger, cloves, nutmeg, cardamom, pepper, aniseed and coriander together in a small bowl. If any of the spices aren’t pre-ground, use a pestle and mortar to crush them before mixing them with the others.
  4. Using a wooden spoon, cream the butter, sugar and honey together in a large mixing bowl before folding in the milk and egg.
  5. Sieve the flour, cocoa powder and baking powder into the mixing bowl and stir them into the butter mixture.
  6. Add the ground nuts, a pinch of salt and four or five teaspoons of the Lebkuchengewurz to the bowl and stir everything together thoroughly. Finally, fold in the citrus peel.
  7. Drop a few tablespoons of Lebkuchen mixture onto each of the circles on the baking paper. Use a spoon to flatten and round out each circle.
  8. Bake the Lebkuchen in the oven for about twenty minutes, or until they’re lightly browned but not burnt. Turn halfway through cooking. Remove the Lebkuchen from the oven and leave them to cool.
  9. Prepare some chocolate glaze and icing to decorate the Lebkuchen with while they’re cooling. Make the glaze by popping the chocolate and flavourless oil in a small microwaveable bowl and microwaving them in 30 second bursts, stirring in between each one, until the chocolate is melted. Don’t microwave the chocolate for more than 30 seconds at a time because it burns very easily! Leave the glaze for five minutes to cool before using.
  10. To make the icing, sieve the icing sugar into a small bowl and add about 20ml of water. Stir thoroughly to combine. Add more water if you want the icing to be runny and more icing sugar if you’d like it to be quite thick.
  11. When the chocolate glaze and icing are prepared, drop one or two large tablespoons of the glaze onto one of the Lebkuchen and use a spoon to smooth it over the whole biscuit. (If it’s really runny and runs off the Lebkuchen, wait a further five to ten minutes until the chocolate has firmed up a little before trying again.) Continue until you have a few chocolate covered Lebkuchen. Repeat the process with the icing, spooning it onto the remaining undecorated Lebkuchen and smoothing it over with a spoon. Then decorate some of the iced Lebkuchen with a couple of whole almonds. (I used glacé cherries!)
  12. Guten apetit!

Tips

  • For more flavoursome biscuits, add some raisins, rum and/or desiccated coconut to the Lebkuchen mixture.
  • You can easily make enough Lebkuchengewurz for several batches of Lebkuchen at once. To do so, prepare six or seven times as much ground cinnamon, ginger, cloves, cardamom, nutmeg, pepper, aniseed and coriander as needed for this recipe. Mix the spices together, pour them into a clean jar and keep it sealed. When ready, give the jar a good shake before spooning out four or five teaspoons of the Lebkuchengewurz and stirring it into your Lebkuchen mixture.
  • If you like, try spooning the Lebkuchen mixture onto some round wafers before baking instead of spreading it straight onto the baking paper. Many recipes call for this: it’s a tradition that can be traced back to the mediaeval monastic origins of Lebkuchen: monks and nuns would use communion wafers as a base for Lebkuchen to prevent the biscuits from sticking.

Background

Pronunciation: [ˈleːpˌku:xn] (leep-kuu-chen)

Home: Southern Germany

Relatives: Piernik (Poland), Pryanik (Russia, Ukraine, Belarus), Pepperkaker (Norway), Pain d’Epices (France), Malt Loaf, Parkin (UK)

History

The honey cakes eaten by the Egyptians, Romans and Greeks were the ancient predecessors of modern gingerbreads like Lebkuchen. These cakes were made in an age when honey was the only readily available sweetener. Even as the mediaeval sugar trade expanded into Europe many bakers continued to sweeten cakes with honey, which was significantly cheaper and more accessible. But as trade routes from Asia opened up they began to use spices like pepper, and later ginger, and varieties of spiced honey cake became popular cross Europe as a result. These include the German Lebkuchen (‘sweet cake’), Pepperkuchen (‘pepper cake’) and Honigkuchen (‘honey cake’), Russian, Ukrainian and Belarusian Pryanik (which derives from the Old Russian word for ‘peppery’), Polish Piernik (also ‘peppery’), Norwegian Pepperkaker (‘pepper cake’) and French Pain d’Epices (‘spice bread.’)

Lebkuchen was invented by monks in Franconia (today part of Bavaria, in central-southern Germany) in the 13th century. It was being made in Ulm (in modern day Baden-Württemberg, south-west Germany) by the late 1200s and in Nürnberg (Nuremberg, in modern day Bavaria) by the late 14th century.

Like Toruń in Poland, Nuremberg was perfectly situated for gingerbread production. The city was on the crossroads of several important trade routes, and was surrounded by the Reichswald, an imperial forest known as the ‘Emperor’s Bee Garden.’ The bakers of Nuremberg thus had access to copious amounts of spices and honey for making Lebkuchen, and the city’s merchants were able to easily export Nürnberger Lebkuchen to neighbouring regions.

Christkindlesmarkt, Nuremberg
Roland Berger, Christkindlesmarkt nuernberg, 2008
https://commons.wikimedia.org/wiki/File:Christkindlesmarkt_nuernberg.jpg [accessed 18/09/2020] https://creativecommons.org/licenses/by-sa/3.0/deed.en

Nuremberg’s association with Lebkuchen was solidified when Friedrich III held a Reichstag in the city in 1487. According to local history the emperor invited four thousand of Nuremberg’s children to a special event, where he presented each of them with gifts of Lebkuchen bearing his portrait. Lebkuchen was taken so seriously in Nuremberg that only members of the city’s baker’s guild had permission to make it, and in the 1500s, the city made a pact with Toruń, agreeing to exchange gingerbread secrets and recipes. Today, Nürnberger Lebkuchen has a protected designation of origin, and can only be commercially produced within city limits.

There are many varieties of Lebkuchen, including Elisenlebkuchen (flourless Lebkuchen), Lebkuchenherzen (heart shaped gingerbread), Lebkuchenhaus (gingerbread house) and Hexenhaus (gingerbread witch’s cottage.)

Buttered Leeks

This quick, simple dish tastes lovely and makes a great accompaniment to roast meats.

Preparation time: 5 minutesCooking time: 15 minutes
Serves: 4 (as a side)Difficulty: Easy

Ingredients

  • 5 leeks
  • 3 tablespoons of butter
  • A sprig of fresh thyme (or a teaspoon of dried thyme)
  • A pinch of salt
  • A pinch of pepper

Make it vegan: replace the butter with a vegan butter or plant based margarine.

Special Equipment

  • A medium sized saucepan with a lid
  • A colander

Method

  1. Remove the roots from the leeks and discard them. Chop the leeks into thin diagonal slices and pop them in a colander. Wash them thoroughly under a tap.
  2. Set a medium sized saucepan over a low-medium heat. Pop the leek slices, along with all the other ingredients, in the pan.
  3. Place the lid on the pan and allow the leeks to cook gently for 15 minutes, stirring once or twice during cooking time.
  4. Take the pan off the heat. If you used fresh thyme, remove it from the pan. Then serve the leeks immediately.
  5. Bon appetit!

Tips

  • If you’d like the leeks to look nice and neat, use a sprig of fresh thyme and white pepper. This will stop the leeks getting dotted with spots of black pepper and dried thyme.
  • Serve the buttered leeks as an accompaniment to a Sunday roast or haggis.

Background

Home: Scotland, Wales, Ireland

Relatives: Braised Cabbage, Fried Onions (International)

History
Buttered Leeks are very popular in Scotland, Ireland and Wales, and the leek is strongly associated with the latter. It’s the Welsh national emblem, and has been a symbol of Welshness since Shakespeare’s day. This might be because, according to legend, the 7th century king of Gwynedd, Cadwaladr ap Cadwallon, is said to have ordered his troops to identify themselves by tying leeks to their helmets whilst battling a Saxon army in a field of leeks. It might also be because leeks are associated with St David, the Welsh patron saint who was bishop of Mynyw, a settlement in south west Wales, in the 6th century AD. David often fasted and would purportedly only eat leeks while he did so.
Perhaps as a result of these legends, the leek is traditionally worn on St David’s Day in Wales, and is also the cap badge of the Welsh Guards. Leeks are used in a few Welsh recipes, including Cawl, and are also eaten in Wales as an accompaniment to roast lamb.

St David’s Cathedral, Pembrokeshire
Chrisrivers, StDavidsCathedral
https://commons.wikimedia.org/wiki/File:StDavidsCathedral.jpg [accessed 11/09/2020] (https://creativecommons.org/licenses/by-sa/3.0/deed.en)

Kheer

You only need a couple of simple ingredients to make Kheer, a sweet, creamy and aromatic traditional Indian dessert

Preparation time: 40 minutesCooking time: 2 hours
Serves: 4Difficulty: Easy

Ingredients

  • 45g/1 1/2oz/1/4 cup of basmati rice
  • 1100ml/11dl/just under 2 pt/4 1/2 cups of full fat milk
  • 90g/3oz/7 tablespoons of sugar
  • 5 cardamom pods, crushed
  • Chopped pistachios, rose petals and/or saffron strands, to decorate

Make it vegan: You really need full fat milk (as opposed to skimmed or semi-skimmed milk) to make thick and creamy Kheer. To emulate this creaminess with vegan ingredients, use 3 1/2 cups of oat or almond milk (not soya milk) combined with one cup of plant-based single cream.

Special Equipment

  • A large heavy bottomed saucepan
  • A large bowl
  • A wooden spoon
  • 4 small glasses or terracotta bowls, to serve

Method

  1. Rinse and drain the basmati rice a few times, until the water runs clear. Then soak the rice in a large bowl of water for half an hour.
  2. Set a large heavy bottomed saucepan over a medium-high heat. Add a 1/4 cup of water to the pan and bring it to the boil. Allow it to boil for 3 minutes before pouring the water away and returning the pan to the heat. (This process helps prevent the Kheer from sticking to the bottom of the pan and burning.) Immediately add the milk to the pan and bring it to a gentle boil.
  3. Drain the rice. Add it to the milk with the cardamom and sugar and stir everything together with a wooden spoon. Bring the heat right down to low and allow the Kheer to simmer for about two hours, or until the mixture is nice and thick. While it’s cooking, scrape the bottom of the pan with the wooden spoon occasionally to prevent bits of rice from sticking and burning.
  4. Pour the finished Kheer into serving bowls or glasses and allow the puddings to rest for about ten minutes- the Kheer will continue to thicken and settle during this time. Then drizzle the finished Kheer with saffron strands, rose petals and/or chopped pistachios.
  5. Serve the Kheer immediately if you’d like to eat it hot. Alternatively, pop it in the fridge for 5 or 6 hours before serving if you prefer it cold.
  6. Maze Karein (مزےکریں)/Khuwar Amez Lôûk (খোৱাৰ আমেজ লওঁক)/Kripyā Bhojan Kā Annand Lijīyai (कृपया भोजन का आनंद लीजिये)!

Tips

  • Kheer has been eaten across the Indian Subcontinent for millennia, so there are many varieties. It can be made with just rice, milk and sugar, but it’s often flavoured and decorated with many ingredients, including cardamoms, almonds, pistachios, cashews, rose water, rose petals, saffron, dried fruit and Kewra water.
  • Similarly, while rice is often used to make Kheer, it can also made using tapioca, vermicelli, almonds, carrots, apples and many other ingredients as a base.
  • Kheer can also be prepared in different ways- in some areas, the rice is cooked and mashed up before being added to the milk, in others, it’s fried up a little with ghee first.
  • Kheer can be eaten hot, cold, or warm depending on how you like it.

Background

Pronunciation: /ˈkɪə/(kheeyr)

Home: India, Pakistan, Bangladesh

Relatives: Shola-e-Zard (Afghanistan, Iran) Khira Sagara (India), Eight Treasure Rice Pudding 八寶飯 (China), Rice Pudding (International)

Konark Temple, Odisha
Alokprasad84, Konark Temple Panorama2, 2011
https://commons.wikimedia.org/wiki/File:Konark_Temple_Panorama2.jpg [accessed 03/09/2020] (https://creativecommons.org/licenses/by/3.0/deed.en)

History

Kheer has been part of the Indian diet for a very, very long time: the dish is mentioned in the ancient Ayurveda texts, and in the 14th century Padmavat of Gujarat. But its specific origins are unknown. Its name derives from the Sanskrit word Kshirika (क्षीर) and/or the Persian word Sheer, both of which mean ‘milk’, and it’s one of many old Indian milk based desserts.

Kheer may have become as popular as it is because of its religious uses. Its main ingredient, rice, gained religious connotations under the Tamil Chola dynasty, and its colouring, Shwet (white), has traditionally been associated with divinity and purity in some parts of India. Perhaps as a result, Kheer became important for religious rituals in some parts of the subcontinent. It has often been linked with the god Shiva, and in some places it is traditionally served to his devotees. It is specifically given to the goddess Ksheer Bhawani as an offering, and is strongly associated with the temples of Guruvayoor and Ambalappuzha, where it’s customarily served to visitors. Kheer is also said to have played an important role in the construction of the Konark Sun Temple, which dates back to the thirteenth century AD: after many failed attempts to build the temple in water, one of its architects used a bowl of Kheer to demonstrate where a bridge could be built to construct it. Today, Kheer is often served up as a treat at religious festivals like Diwali, Ramadan and Eid and at special occasions like birthdays and baby showers, as well as as a casual, everyday dessert.

Because Kheer has been eaten across South Asia and the Indian Subcontinent since ancient times, there are many varieties. It’s eaten hot, warm or cold, made using rices, millets, pastas and fruits as a base, and can be flavoured with many different spices, fruits, nuts and sweets. Regional varieties include Payasam (a thin pudding from southern India, often made with jaggery), Gil-e-Firdaus (a thicker pudding from Hyderbad), Phirni (a northern Indian pudding introduced by Persians, made with ground rice), Payas (eaten in eastern India and Bengal on special occasions) and Payesh (Kheer with jaggery, from eastern India), as well as versions found in surrounding countries, like Sher Birinj (eaten in Afghanistan, Iran and Pakistan.)

Barbagiuan

Preparation time: 1 hourCooking time: 20 minutes
Serves: 6 (makes about 18)Difficulty: Moderate

Ingredients

For the pastry:

  • 200g/7oz/just over 1 1/2 cups of plain flour, plus extra for dusting
  • 3 tablespoons of olive oil
  • A pinch of salt
  • 1 egg
  • 3 tablespoon of water

For the filling:

  • A tablespoon of olive oil
  • 2 shallots
  • 100g/3 1/2 oz/just under half a cup of spinach leaves
  • 340g/12 oz/1 bunch of Swiss chard leaves, stems removed (use bok choy, cavolo nero or leeks as a substitute for Swiss chard if you can’t get ahold of it)
  • 2 tablespoons of ricotta OR boiled rice
  • A tablespoon of grated Parmesan
  • A pinch of salt and pepper
  • 2 eggs

For frying:

  • 1 egg
  • Olive oil

Make it vegan: Use 2 tablespoons of boiled rice or silken tofu instead of ricotta, and use a tablespoon of vegan cheese instead of Parmesan– or try using homemade vegan ricotta and Parmesan. Use four tablespoons of silken tofu, vegan ricotta, or scrambled egg substitute (like VeganEgg or Scramblit) instead of the eggs in the filling, and use aquafaba or flax egg instead of the egg in the pastry and the egg used to stick the pastries together.

Special Equipment

  • A sieve
  • A large mixing bowl
  • A large saucepan
  • A frying pan
  • A rolling pin
  • A 4cm cookie cutter

Method

  1. To make the pastry, sieve the flour into a large mixing bowl and add the salt, egg, olive oil and water. Mix everything together thoroughly to form a ball of dough.
  2. Sprinkle some flour onto a clean surface and turn the dough out onto it. Knead it for about 5 minutes, until the dough is smooth. If it seems too crumbly, add a little more cold water, and if it’s too wet, add some more flour.
  3. Return the dough to the mixing bowl and cover the bowl with a tea towel. Pop it in the fridge to chill for 30 minutes.
  4. Meanwhile, set a frying pan over a medium heat. Add a tablespoon of olive oil and the shallots, and sauté them for a couple of minutes, stirring occasionally.
  5. Add the spinach and Swiss chard to the pan with the shallots. Sauté the vegetables for a further 5 to 10 minutes, stirring occasionally, or until the vegetables are tender.
  6. Remove the pan from the heat and allow its contents to cool for a few minutes. Then add the ricotta or boiled rice, Parmesan, salt, pepper and eggs to the pan and stir everything together thoroughly.
  7. Sprinkle some flour onto a clean surface. Use a rolling pin to roll out the pastry. It should be about 5mm thickness.
  8. Use the 4cm cookie cutter to cut out little circles of dough, then roll each circle out more until it’s about 8cm in diameter. Repeat until you have used up all the dough- you should end up with about 18 circles.
  9. Drop a teaspoon of filling to the centre of each circle. Beat the remaining egg and use a pastry brush to brush it around the edge of each circle. Then fold each circle in half to form semi circles. Press the edges down and seal the pastries with a fork.
  10. Add some olive oil to a saucepan- it should be at least 8cm deep. Set it over a high heat and heat the oil until it’s about 180’C (or until a bit of pastry dropped into the oil quickly bubbles and begins to brown.)
  11. Lower a couple of pastries into the oil at a time and fry them for about 5 minutes, or until they’re very hot and golden brown. Repeat until all the pastries have been cooked.
  12. Serve the Barbajuan immediately, while they’re very hot.
  13. Bon Appetit!

Tips

  • If you like you can keep any cooked Barbaguian warm in the oven while the rest are being fried before serving.

Background

Home: Monaco, Northern Italy, French Riviera

Pronounciation: (Bar-bah-Jean)

Relatives: Cornish Pasty (Cornwall), Pierogi (Poland),

History

Monaco’s culinary history is interwoven with that of the neighbouring French Riviera and Italian region of Liguria. All three sit on the Mediterranean coast and enjoy its warm climate, so fish and seafood, as well as fresh fruit and vegetables, are abundant and used in many of their recipes. The Swiss chard used in Barbiguian, for example, is also the key component in another Monégasque dish, Swiss Chard Pie. Barbagiuan itself is very popular in the French Riviera, Monaco and Liguria, and in the latter is often stuffed with pumpkin instead of Swiss chard.

Barbagiuan means ‘Uncle John’ in Monégasque. It is named after its supposed creator, a man named Jean (John.) According to legend, Jean was a man who wanted to make ravioli but, realizing he didn’t have anything to use as filling, stuffed his ravioli with Swiss chard and tried frying it. His creation proved to be tasty and popular, and became known as BarbaGiuan (‘Uncle John’) in his honour.

It remains a very popular Monégasque appetizer, and is widely available at Monacan markets. Being Monaco’s national dish it is also a key part of Monaco’s national holiday, La Fête du Prince (November 19th), and is now specifically celebrated at Monaco’s La Fête du Barbagiuan, where attendees can enjoy Barbagiuan cooking demonstrations, culinary classes and Barbagiuan-related events.

Rock of Monaco
Georges Jansoone, Monaco003, 2009 https://commons.wikimedia.org/wiki/File:Monaco003.jpg [acessed 13/08/2020] (https://creativecommons.org/licenses/by/3.0/deed.en)


Käsknöpfle

Käsknöpfle is a traditional Alpine dish made up of delicious pasta dumplings, topped with melted cheese and caramelized onion.

Preparation time: 20 minutesCooking time: 30 minutes
Serves: 4Difficulty: Moderate


Ingredients

For the Knöpfle:

  • 500g/18oz/4 cups of plain flour
  • 8 eggs
  • A pinch of salt
  • A pinch of nutmeg
  • 200ml/1dl/1/5 pt/just under half a cup of cold water

For the toppings:

  • 170g/6oz/just under 2 cups of Gruyère, Appenzeller or Fontina cheese, grated or cut into chunks
  • 170g/6oz/1 1/3 cups of Emmental cheese, cut into chunks
  • 100g/3 1/2 oz/just under half a cup of butter
  • 2 yellow onions
  • A pinch of salt and pepper

Make it vegan: Replace the eggs with 24 tablespoons (approx. 425ml) of aquafaba, or with flax egg, which you can make by combining 8 tablespoons of ground flaxseed with 20 tablespoons (approx. 350ml) of water. Leave the flax egg mixture to sit for five minutes before using.
Use plant based margarine instead of butter, and use vegan German cheeses from brands like Bute Island instead of Gruyère, Appenzeller, Fontina and Emmental. Or you can make your own: Miyoko Schinner’s Artisan Vegan Cheese has recipes for both Gruyère and Emmental.

Special Equipment

  • A Spätzle maker. This is like a cheese grater which you push dough through. Alternatively, use a colander or a cheese grater.
  • A large mixing bowl
  • A medium sized saucepan (using a medium sized saucepan rather than a larger one means you can rest the Spätzle maker on the sides of the pan while you’re pushing the Knöpfle through)
  • A large frying pan or skillet
  • A colander
  • A casserole dish

Method

  1. First make the Knöpfle: sift the flour into a large mixing bowl. Add the salt, eggs, nutmeg and water and stir everything together thoroughly. The mixture should form a thick, viscous liquid, like pancake batter- if it seems too thick add a little more water.
  2. Cover the bowl with a tea towel and leave it for 20 minutes. While the Knöpfle mixture is resting, prepare the onions by peeling them and chopping them width-ways into strips.
  3. Heat the butter in a large frying pan or skillet set over a low-medium heat, and add the onions. Sauté them for about 20 minutes, or until they’re soft and golden brown. If desired, continue sautéing them until they’re crispy and brown.
  4. Preheat the oven to 140°C/275°F/Gas Mark 1.
  5. Set a medium sized saucepan of water over a high heat. Add a tablespoon of salt to the water and bring it to the boil.
  6. When the water begins to boil, set a Spätzle maker (or a colander) over the saucepan and drop some of the Knöpfle dough through it, allowing the dumplings to fall directly into the boiling water. (See tips.) Once they’re in the pan the Knöpfle only take about two minutes to cook- they’re ready when they float to the surface. Lift them from the water with a slotted spoon and drain them in a colander or sieve. Use the Spätzle maker to drop some more Knöpfle batter into the pan. Pour the finished Knöpfle into a casserole dish and pop it in the oven to keep them warm while you cook the remaining Knöpfle in the pan.
  7. When all the Knöpfle have been cooked and added to the casserole dish, add the cheese to the dish and mix everything together. Return the dish to the oven for five minutes, or until the cheese has melted.
  8. When it’s ready, pour the Käsknöpfle into individual serving bowls and top with the caramelized onion. Serve immediately.
  9. Guten Appetit!

Tips

  • A Spätzle maker allows you to drop little Knöpfle dumplings straight into the boiling cooking water, which prevents them from sticking together when they’re cooking. To do this, nestle the Spätzle maker on the saucepan with the sliding box facing upwards. Pop a few tablespoons of the Knöpfle dough into the sliding box, then, holding the handle of the Spätzle maker in one hand, manually slide the box from side to side with your other hand like you’re grating cheese. This will help bits of Knöpfle drop through the holes, straight into the water.
  • If you have trouble pushing the Knöpfle through the Spätzle maker, the batter is too thick- add some more water to the batter and try again.
  • If you can’t get ahold of a Spätzle maker, you can use a colander (or even a cheese grater) instead- set the colander over the pan of water, pop some Knöpfle batter into it, and use a wooden spoon to push bits of batter through the holes into the water. Alternatively, add less water to the batter when you make it, so it is quite thick and reasonably solid, then roll it up on a chopping board and cut it into tiny little pieces and drop these into the water manually.
  • If the Knöpfle seem a little dry when you add them to the casserole dish, add a little water and stir everything together before you add the cheese.
  • Käsknöpfle should be served with green salad, potato salad, and/or applesauce

Background

Home: Liechtenstein, western Austria, southern Germany, Switzerland

Pronunciation: (Keehsk-nup-fhluh)

Relatives: Bryndzové Halušky (Slovakia), Gnocchi (Italy), Vaseršpacli (Slovenia), Macaroni Cheese (UK/USA)

History

Liechtenstein is a landlocked germanophone Alpine microstate, bordered by St. Gallen in eastern Switzerland and Vorarlberg in western Austria. It shares strong cultural and culinary similarities with both, as well as with the nearby southern German states of Bavaria and Baden-Wurttemberg. Liechtenstein’s national dish, Käsknöpfle, is also traditionally eaten in these regions: it’s known as Käsespätzle in the southern German states and Switzerland. In parts of Austria, the Knöpfle, cheese and onion are mixed and cooked together in a pan, and it’s known as Kasnocken.

Käsknöpfle, Käsespätzle and Kasnocken all mean ‘cheese dumplings.’ Different cheeses are used in each. Emmental and Gruyère are often favoured because of their melting properties, which allow them to set nicely around the Knöpfle: for similar reasons, these cheese are also used in Swiss fondue and gratins. Other types of Bergkäse are used for Käsespätzle in southern Germany, while types of Sauerkäse and Räßkäse are used in western Austria.

Egg and flour pasta dumplings like Knöpfle and Spätzle, as well as Hungarian Nokedli and Slovakian Halušky, are a traditional food across the Alps and central Europe. The oldest known reference to flour-based ‘Knöpflein’ and ‘Spazen’ dates back to the early 18th century, when they were recorded as being eaten in Württemberg, but in all likelihood they have been eaten since at least mediaeval times. Their names refer to their size: ‘Spätzle‘, their Swabian name, means ‘little sparrows’, while Knöpfle means ‘little buttons.’ Though initially they were a staple food, as living standards and food resources improved over the course of the nineteenth century they were increasingly viewed as a delicacy, to be eaten during special occasions, festivals and feasts.

Vaduz Castle, Liechtenstein
Michael Gredenberg, Schlossvaduz, 2004
https://commons.wikimedia.org/wiki/File:Schlossvaduz.jpg [accessed 05/08/2020] (https://creativecommons.org/licenses/by-sa/3.0/deed.en)