Vegan Bûche de Noël


Preparation time: 30 minutesCooking time: 11 minutes
Serves: 10Difficulty: Moderate

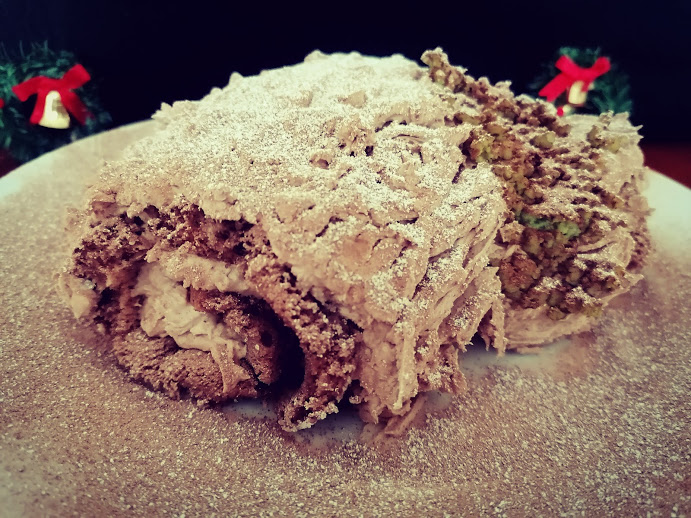
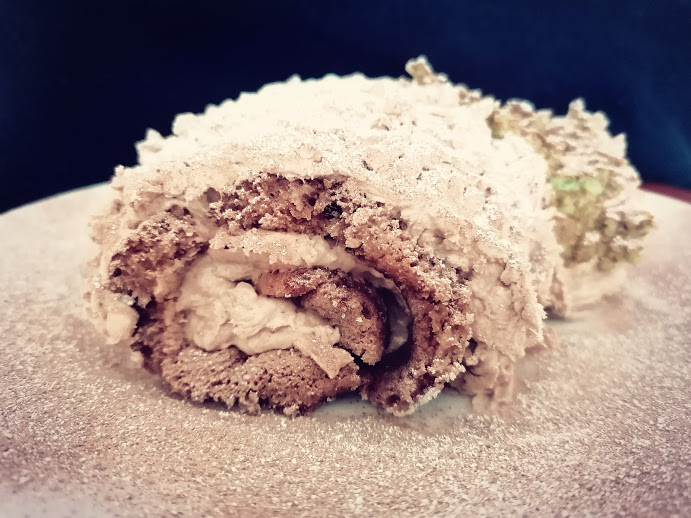
A Bûche de Noël, or Yule Log, is a French chocolatey Christmas cake. It consists of a sponge, which is rolled up into a log, smeared with chocolate buttercream ‘bark’ and adorned with edible decorations, so it looks just like a real Yule Log!

Ingredients

For the sponge:

  • 135ml/1⅓ dl/¼ pt/9 tablespoons of aquafaba
  • A teaspoon of apple cider vinegar
  • 100g/3½ oz/½ cup of caster sugar, plus extra for sprinkling
  • 80g/3 oz/⅔ cup of self raising flour
  • 2 tablespoons of cocoa powder

For the buttercream:

  • 200g/7 oz/just under a cup of dairy free butter or margarine, at room temperature, plus extra for greasing
  • 400g/14 oz/just over 3 cups of icing sugar, plus extra for dusting
  • 50g/2 oz/¼ cup of chestnut purée
  • 50g/2 oz/⅓ cup of vegan milk chocolate, melted

For decoration:

  • Some vegan marzipan (optional)
  • Some roughly ground pistachios (optional)

Special Equipment

  • A 20 x 30cm baking tray
  • Baking paper
  • A pastry brush
  • An electric whisk
  • A large glass or copper mixing bowl, plus a second mixing bowl
  • A sieve
  • A spatula
  • A serving plate or cake board
  • A knife and fork

Method

  1. Preheat the oven to 200°C/400°F/Gas Mark 6.
  2. Line the baking tray with baking paper, and lightly grease the baking paper with butter using a pastry brush.
  3. Pour the aquafaba and vinegar into a large, very clean mixing bowl. Whisk them together with an electric whisk for ten minutes, or until the aquafaba becomes white, very thick, and stiff peaks form.
  4. Add the sugar to the aquafaba and whisk them together for a further five minutes.
  5. Carefully sieve the flour and cocoa powder into the bowl and use a spatula to fold them into the aquafaba mixture. Fold them in (gently) until they’re fully incorporated into the aquafaba, but use the minimum amount of sweeps possible. Do ensure you fold (from side to side) and don’t stir (round and round). This technique will ensure the batter doesn’t lose air, which it needs lots of to rise in the oven.
  6. Gently pour the batter onto the baking paper, and use the spatula to spread it out evenly.
  7. Bake the sponge in the oven for about 11 minutes, or until it’s lightly browned and springy. Remove the tray from the oven.
  8. Take a second sheet of baking paper, the same length as the first, and sprinkle it with caster sugar. Upturn the cooked sponge onto this, leave it for a few seconds, then very gently peel off the baking paper it was baked on. Roll the second sheet of baking paper and the sponge together lengthways into a Swiss Roll- you will unfold it and remove the baking paper later, but it needs to be rolled up while it’s still warm and pliable so that it keeps the right shape.
  9. While it’s cooling, make the buttercream. Use the electric whisk to whisk the butter and icing sugar together until well combined and lump free. Then add the chestnut purée and melted chocolate to the bowl and beat them into the buttercream.
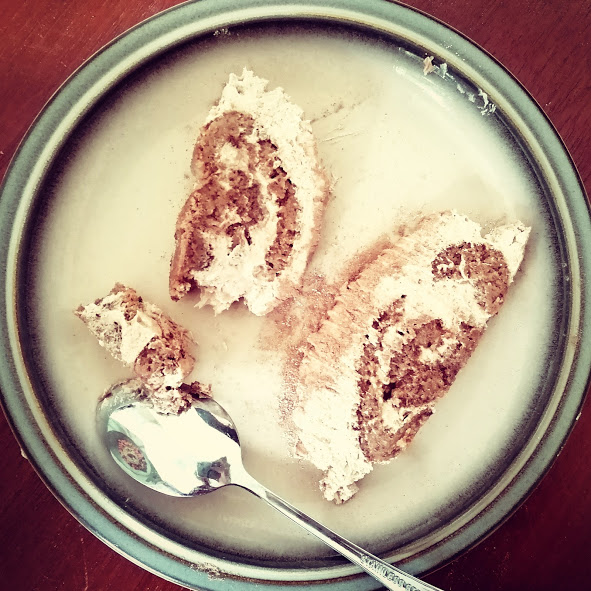
  10. When the sponge is cool, unroll it and remove the baking paper. Spoon a third of the buttercream onto the sponge and use a knife to spread it out evenly before re-rolling it. If desired, use the knife to trim the ends of the log to neaten it up.
  11. Transfer the log to a serving plate or cake board. Use a large knife to smear the remaining buttercream over it, ensuring the top and sides are completely covered.
  12. Cut a section off the end of the log and attach this section to the side, so it looks like a little nub of wood. Then use a fork to drag rough lines through the buttercream to give it a bark-like appearance. If desired, you can also make some DIY mushrooms and/or moss to decorate the log with (see tips).
  13. Use a sieve to sprinkle the log with a little icing sugar, so it looks like it’s been dusted with snow.
  14. Bon appetit!

Tips

  • It’s essential that you whisk the aquafaba for ten minutes, and then for a further five minutes after you’ve added the sugar. You also need to gently fold (don’t stir) in the flour. This is because the batter needs to incorporate lots of air so it will rise in the oven, and you don’t want to lose this by stirring it out.
  • If desired, you can fashion some little mushrooms out of marzipan and stick them onto the log.
  • You can also create quite realistic looking ‘moss’ by sprinkling the log with roughly ground pistachios.

Background

Home: France, Switzerland, Belgium

Pronunciation:  ​(boosh de now-ell) [byʃ də nɔɛl]

Relatives: Swiss Roll, Roulade (International), Bisquitrolle (Germany), Génoise  (Italy)

History

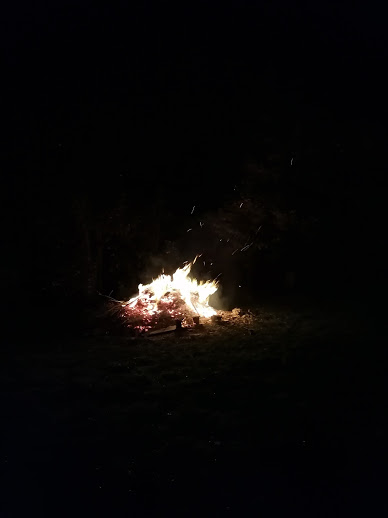
The Bûche de Noël, or Yule Log, is named after- and fashioned to look like- the Yule Log once commonly burnt on the hearth at Christmastime. This Northern European tradition can be traced back millennia, to when pre-Christian peoples in Scandinavia, Germania and the British Isles followed Norse and Pagan religions. These peoples celebrated the Winter Solstice, or Yule, at the end of December. Since this time of year was often dark, wet, freezing and miserable, people needed a little light and warmth to get by until after the solstice, when days would slowly begin to get longer and warmer and food would become more bountiful. As such, they celebrated by burning the Yule Log, which provided them with light and warmth: initially they may have burnt entire trees, but it eventually became customary to choose a special log.

Over the centuries, as Christianity spread through the region, the pagan ceremonies associated with the Yule Log were forgotten. But the log itself was still brought in every year and lit on the hearth, and it became a symbol of good luck.

The Bûche de Noël cake is of unknown origin. The first known recipe appeared, alongside several other cake recipes, in Gervaise Markham’s 1615 book, ‘The English Huswife’. By the late 19th century it had been modernized and popularised thanks to the collective efforts of French cooks including Antione Caradot (a Parisian chef), Pierre Lacan (the prince of Monaco’s pastry chef), Alfred Suzanne (a chef and author) and Félix Bonnat (a chocolatier). It was introduced to modern audiences by the American chef Julia Child in 1965, during an episode of The French Chef.

Bûche de Noël is still very popular today, particularly in France and Francophone countries. The French cookery site, Marmiton, has dozens of Bûche de Noël recipes, including logs flavoured with Nutella, chocolate orange, tiramisu, forest fruits, and citrus.

Kerststol

Kerststol is a Dutch sweet bread which contains dried fruit, nuts, citrus and almond paste. It’s very similar to the German Stollen and is eaten during the Christmas period.

Preparation time: 50 minutesTotal time needed for soaking/rising: 24 hours
Cooking time: 30 minutes Serves: 20 or more
Difficulty: Moderate

Ingredients

For the almond paste:

  • 250g/9 oz/2 cups of almonds
  • 250g/9 oz/2 cups of icing sugar, plus extra for dusting
  • Juice of one lemon
  • 1 egg white
  • 25ml/¼ dl/1½ tablespoons of water

For the filling:

  • 100g/3½ oz/⅔ cups of chopped nuts (almonds, hazelnuts and/or walnuts)
  • 350g/12 oz/just over 2 cups of dried fruit (currants, sultanas, apricots, figs, cranberries and/or candied peel)
  • 50ml/½ dl/⅕ cup of rum

For the dough:

  • 550g/19½ oz/4½ cups of plain flour, plus extra
  • 260ml/2½ dl/½ pt/1 cup of milk, lukewarm
  • 14g/½ oz/4 teaspoons of dried yeast
  • 80g/3 oz/just under ½ cup of white caster sugar
  • A teaspoon of salt
  • ½ teaspoon of nutmeg
  • ½ teaspoon of cinnamon
  • 120g/4 oz/½ cup of butter, at room temperature
  • Zest of one lemon
  • Zest and juice of one orange
  • ½ teaspoon of vanilla
  • 2 eggs
  • 1 egg yolk

Make it vegan: use soya, almond or oat milk instead of dairy milk and make sure you use a vegan brand of butter. Use aquafaba instead of the egg white, egg and egg yolk: use 1 tablespoon of aquafaba in the almond paste, 4 tablespoons in the dough, and 3 tablespoons for brushing the Kerststol with before before baking.

Special Equipment

  • A large mixing bowl
  • Tea towels
  • A rolling pin
  • One or two large baking trays
  • Baking paper
  • A pastry brush
  • A sieve, for dusting

Method

  1. Make the almond paste the day before you make the Kerststol. To do so, pour the almonds into a blender and process them into they are well ground and powdery. Then add the icing sugar and grind until the almonds and sugar are well blended.
  2. Next, add the lemon juice and egg white to the blender. Pulse them with the almonds and sugar until a smooth paste forms. If needed, add the water.
  3. Cover the almond paste and leave it in the fridge overnight. Mix the dried fruit and rum together in a large mixing bowl, cover with a tea towel, and leave overnight.
  4. The next day, make the Kerststol. Add the milk, yeast and half the flour to a large mixing bowl, mix them together and leave them to sit for ten minutes. Then add the sugar, salt, cinnamon, nutmeg, butter, vanilla, lemon zest, orange zest and juice, egg yolk, one of the eggs and the remaining flour to the bowl and knead everything together by hand for 20 minutes, or until a smooth dough forms. If, after ten minutes of kneading, it seems too sticky, knead in a little flour, and if it seems too dry, add a little more milk.
  5. Cover the bowl with a tea towel and leave it in a warm place for 20 minutes so the dough can rise.
  6. Pour the dried fruit onto the dough along with the chopped nuts. Knead the dough, fruit and nuts together for a couple of minutes or until the fruit and nuts are well incorporated. Then separate the dough into two balls and cover them with a tea towel before leaving them in a warm place for a further 20 minutes.
  7. Line two baking trays with baking paper.
  8. Beat the remaining egg in a bowl. Use a rolling pin to roll the two balls out into circles on a floured surface, until the discs are about 2 cm thick. Transfer them to the baking sheets and use a pastry brush to brush them with the beaten egg.
  9. Divide the almond paste in two and use your hands to roll it into two sausages, which need to be slightly shorter than the length of the dough discs. If the paste is too sticky, add a little icing sugar.
  10. Place a sausage along the middle of each dough disc, ensuring there is a little dough left on either side of the ends of the almond paste. 
  11. Brush the edges of the dough discs with more of the beaten egg. Fold one half of each dough disc over the almond paste in the centre, so the discs form semi circles. Ensure the top edges don’t overlap the bottom edges.
  12. Cover the Kerststols with a tea towel and leave them to rise for 45 minutes in a warm place.
  13. While they’re rising, preheat the oven to 180°C/350°F/Gas Mark 4. 
  14. Brush the Kerststols with more of the beaten egg (beat another egg if you’ve run out) and pop them in the oven. Bake them for 30 minutes, or until they’re golden brown. Rotate them once while they’re cooking so they get an even coverage and turn the temperature down if you feel they’re at risk of browning too quickly.
  15. Remove the Kerststols from the oven and leave them to cool before dusting them with icing sugar.
  16. When ready to eat, cut the Kerststols into slices and eat them with butter and apricot jam.
  17. Smakelijk eten!

Tips

  • When making the almond paste, ensure you grind the almonds to a very fine powdery consistency. Alternatively, you can also buy ready made almond flour in some shops, which will save you the trouble of ensuring they’re finely ground.
  • The Kerststol should keep for three or four days if stored in a sealed container.
  • Kerststol can also be made at Easter, when it’s known as Paasbrood.

Background

Pronunciation: /ˈkɛr.stɔl/ (kers-stohle)
Home: The Netherlands
Relatives: Stollen (Germany), Paneettone (Italy)
History

Kerststol and Stollen are a traditional Christmas treat in the Netherlands and Germany, and are Germanic in origin: it has been suggested that they first originated as a yuletide fertility symbol. During the Middle Ages they were eaten during Advent, and were deliberately made to be plain and unsweetened as Advent was considered to be a time for fasting. It was only from the 15th century onward that Stollen and Kerststol contained butter and became softer, sweeter breads. As time went by classically Christmassy ingredients like nuts, dried fruit, citrus and marzipan were added and they became sweeter still.

Christmastime in the Netherlands is celebrated throughout December. The main event is on the 5th December, St. Nicholas’ Eve, when Sinterklaas (St. Nicholas), who is said to have arrived in the Netherlands by boat from his home in Spain a few weeks earlier, delivers presents for children. As the largest celebrations take place on the 5th, Christmas itself (Eerste Kerstdag) is a comparatively quiet affair which usually consists of family time, food and church services: it’s actually followed by a second Christmas Day (Tweede Kerstdag), with more of the same, in lieu of Boxing Day. There is less emphasis on presents on Christmas, as most presents were given out on the 5th. Nevertheless, Kerstman (Father Christmas) is said to come from Lapland on Christmas Eve to deliver a few more gifts.

The arrival of Sinterklaas
Sander van der Wel, Intocht van Sinterklaas in Schiedam, 2009
https://commons.wikimedia.org/wiki/File:Intocht_van_Sinterklaas_in_Schiedam_2009_(4102602499)_(2).jpg [accessed 17/12/2020] (https://creativecommons.org/licenses/by-sa/2.0/deed.en)

Rødkål

Rødkål is braised red cabbage which is served as an accompaniment to roast meats. It’s eaten in the Nordic countries- Denmark, Norway and Sweden- all year round, but is particularly popular at Christmas.

Preparation time: 5 minutesCooking time: 65 minutes
Serves: 10 (as a side)Difficulty: Easy

Ingredients

  • 1kg/35 oz/a moderately large head of red cabbage
  • 50g/2 oz/3 full tablespoons of butter or duck fat
  • 200ml/2dl/⅓ pt/just under a cup of apple cider vinegar
  • 200ml/2dl/⅓ pt/just under a cup of redcurrant juice, or 100ml of redcurrant jelly dissolved in 100ml of water
  • 1 tablespoon of sugar
  • ½ teaspoon of salt
  • ½ teaspoon of ground allspice

Make it vegan: ensure you use a vegan brand of butter, or replace it with margarine.

Special Equipment

  • A sharp knife
  • A large saucepan with a lid

Method

  1. Finely cut the cabbage with a sharp knife and pop it in the saucepan with the butter. Set it on the hob over a medium heat and allow the cabbage to sauté for two or three minutes, stirring occasionally.
  2. Add the vinegar and salt to the pan and allow the cabbage to cook for two or three more minutes, or until it has withered slightly.
  3. Finally, add the redcurrant juice, sugar and allspice to the pan and stir everything together.
  4. Cover the pan with the lid and turn the heat down to low. Cook the Rødkål for an hour, stirring it every once in a while while it cooks. Then remove from the heat and serve immediately.
  5. Velbekomme!

Tips

  • Rødkål should be served as an accompaniment to roast meats or meatballs.
  • If desired, you can substitute the allspice with bay leaves, cinnamon, cloves and/or pepper.
  • If you aren’t a fan of vinegar, halve the amount used and substitute it with some extra redcurrant juice.
  • You can also add some sliced apple to the red cabbage to make Rødkål med Abler.

Background

Home: Denmark, Norway, Sweden

Pronunciation: (Roeth-khoel)

Relatives: Rotkhol (Germany), Sauerkraut (Germany), Braised Red Cabbage (UK), Coleslaw (Netherlands)

History

In Denmark Christmas is celebrated from the beginning of Advent through to the end of December. The country’s festive traditions derive from the ancient pagan Norse Jul/Yule celebrations, which were blended with Christian Christmas celebrations after Denmark converted in the 11th century.

The main festive celebrations are held on Juleaften (Christmas Eve), which is preceded by Lillejuleaften (Little Christmas Eve) and followed by a Familiejulefrokost (Family Yule Lunch) on Christmas Day. On the evening of Juleaften Danes eat a large Christmas dinner consisting of roast pork, duck or goose, accompanied by caremalized potatoes, gravy and Rødkål (lit. ‘red cabbage’). This is followed by Risalamande (rice pudding) and Kirsebærsovs (cherry sauce).

Rødkål is an essential part of the meal. It’s also eaten throughout the year as an accompaniment to Frikadeller (meatballs), Flæskesteg (roast pork with crackling) and Smørrebrød (an open sandwich), and can be eaten hot or cold.

Glade Jul by Danish artist Viggo Johansen

Panettone

Panettone is a traditional fruity sweet bread originally from Milan, which is popular at Christmas and New Year in Italy and worldwide.

Preparation time: 2 hoursRising time: 3 days
Cooking time: 50 minutesServes: 15
Difficulty: Difficult

Ingredients

For the starter:

  • 70ml/⅕ pt/¼ cup of warm milk
  • 7g/¼ oz/2 teaspoons of dried yeast
  • 100g/3½ oz/just under a cup of strong white flour

For the dough:

  • 400g/14 oz/just over 3 cups of plain flour, plus extra
  • 180g/6 oz/just under a cup of sugar
  • 6 large eggs yolks
  • 180g/6 oz/just over ¾ cup of butter at room temperature, plus extra

For the aromatic mix:

  • A teaspoon of honey
  • Pinch of salt
  • Peel and juice of one unwaxed lemon
  • Peel and juice of one unwaxed orange
  • A teaspoon of vanilla extract
  • 400g/14 oz/just under 2 cups of dried fruits and nuts

For dusting:

  • Icing sugar

Special Equipment

  • A large mixing bowl
  • A sieve
  • A tea towel
  • A Panettone or tall cake tin
  • A heatproof bowl
  • A pastry brush

Make it vegan: use soya milk instead of dairy milk, and plant based margarine or non dairy butter instead of butter. Use golden syrup or Honea instead of honey, and replace the egg yolks with 6 tablespoons of aquafaba.

Method

  1. Pour the warm milk into a large mixing bowl, then sprinkle in the yeast. Sift the 100g of flour into the bowl and stir everything together. Knead it briefly with your fingers, then cover the bowl with a damp tea towel. Leave the bowl in a warm place for an hour so the dough can rise, then transfer it to a fridge for eight hours, or overnight.
  2. When ready, remove the bowl from the fridge for an hour so the dough can warm up slightly. Then add half of the remaining flour and knead it into the sticky dough for five minutes. Next, add half of the sugar, egg yolks and butter, and knead everything together for a further ten minutes, or until the dough comes together and is springy. If it seems a little too wet, add some extra flour.
  3. Return the dough to the large mixing bowl, cover with the tea towel, and leave it to rise again for another six hours.
  4. In a separate bowl, prepare the aromatic mix by combining the honey, salt, vanilla, and orange and lemon juice and zest together. In another bowl, soak the dried fruits in a little water or fruit liquor.
  5. When ready, repeat step three with the remaining dough ingredients: knead the remaining flour into the dough, before adding the remaining egg yolks, sugar and butter. Knead for approximately fifteen minutes. Then drain the dried fruits and add them, along with the aromatic mix and any nuts you might be using, to the dough. Knead everything together for a further ten minutes. Again, if the dough is a little wet, add some more flour.
  6. Grease a baking sheet and use it to line a Panettone tin or tall cake mould. Add the dough ball to the tin, cover with the tea towel, and leave it in a warm place for two hours before transferring to the fridge for eight hours, or overnight.
  7. Preheat the oven for 180°C/350°F/Gas Mark 4 and pop a large heatproof bowl of water in the bottom of the oven.
  8. Remove the tea towel from the dough and leave it to rest for a further half an hour, so the surface can dry out a little.
  9. Use a sharp knife to cut a deep cross on the top of the dough, before using a pastry brush to thickly dab it with butter.
  10. Bake the Panettone for 50 minutes, turning it occasionally so that it doesn’t become too brown on one side. If it’s in danger of burning, turn the temperature down and cover the Panettone with some aluminium foil.
  11. Remove the Panettone from the oven and leave it to cool for about half an hour before upturning it. Dust it with icing sugar, cut it into slices, and serve.
  12. Buon Appetito!

Tips

  • You can use any combination of dried fruits and nuts in the Panettone– choose from raisins, sultanas, currants, dried apricots, candied peel, candied fruit, glace cherries, walnuts, pistachios, or almonds. If desired these can left to soak in fruit liquor for a few hours before cooking. I used a mixture of raisins, dried apricots and whole almonds!

Background

Pronunciation: /ˌpænəˈtoʊni/ (pan-net-tone-ee)

Home: Milan, Italy

Relatives: Stollen (Germany), BoloRei (Portugal), Tsoureki (Greece), Kerststol (Netherlands)

History

There are three main legends regarding the invention of Panettone, and they all date back to the late fifteenth century, when the Duchy of Milan was ruled by the House of Sforza. The Duchy, which encompassed the city of Milan and much of Lombardy, was a state of the Holy Roman Empire with a shaky past. Like many northern Italian cities, Milan was engulfed by the rivalry between Guelphs (supporters of the Pope) and Ghibbelines (supporters of the Holy Roman Emperor) in their ongoing power struggle. Furthermore, the region had undergone significant turmoil in the mid fifteenth century, after the last of the Visconti dukes, Filippo Maria, died without male heirs: the Milannese briefly tried to form a republic, but it was unstable and was soon conquered by Francesco I Sforza, who married Visconti’s daughter Bianca and became Duke. 

Ludovico Sforza was the third of Francesco and Bianca’s sons to become Duke of Milan: he ruled the region from 1494 to 1499. Ludovico was known as Ludovico il Moro and is perhaps best known today for commissioning Leonardo Da Vinci’s The Last Supper. At the time, however, he was known for losing control of Milan to the Kingdom of France: in fact, Machiavelli’s presentation of this loss made Ludovico infamous for centuries. 

Ludovico Sforza, by Giovanni Ambrogio de Predis

Panettone was allegedly created in Ludovico’s palace kitchens. According to the story Ludovico, his wife, and his court were gathered one year for a Christmas feast and his kitchen staff were overworked and busy. So overworked, in fact, that the dessert centerpiece was accidentally burnt! Everybody panicked, but the young kitchen scullion, ‘Toni’, has some dough of his own lying around, which he was planning on cooking for himself for Christmas. ‘Toni’, either voluntarily or at the behest of the head chef, gave up his Christmas treat for the greater good: he kneaded eggs, butter and fried and candied fruit into the dough and baked it for the aristocrats upstairs. The smell produced by the bread as it was being baked delighted the kitchen staff, and when it was served to the duke and his guests they found it to be delicious. ‘Pan de Toni’ becomes an instant hit with the people of Milan. 

However, since ‘Panettone’ also means ‘large loaf cake’, the ‘Toni’ aspect of the Sforza story seems slightly suspect. According to a different story Panettone was invented by a young nobleman, ‘Ughetto’ Atellani, who lived under Ludovico. Ughetto was in love with the daughter of a failing baker, and his family naturally disapproved of the match. To win them over, ‘Ughetto’ joined the bakery and set out to make his future step father rich. To do this he began kneading butter, sugar, eggs and fruit into the bakery’s dough, making it sweet, tasty, and popular enough with the local townsfolk that his father in law became rich, and ‘Ughetto’ was able to marry his true love. A third story for Panettone‘s origins is that a ‘Sister Ughetta’ lived in a poor Milanese convent, and one day decided to make her sisters happy by kneading some butter, eggs, sugar and fruit into the Christmas dough and making their bread extra tasty.

Mince Pies

Mince Pies are sweet, spiced and boozy fruit pies of English origin, and are traditionally eaten throughout the Christmas period.

Preparation time: 90 minutesSoaking time: At least 4 hours
Cooking time: 20 minutesServes: 12
Difficulty: Moderate

Ingredients

For the mincemeat:

  • 250g/9 oz/1⅔ cups of raisins
  • 375g/13 oz/2 cups of currants
  • 100ml/1dl/⅕ pt/just under ½ cup of brandy (see tips)
  • Grated zest and juice of a lemon
  • Grated zest and chopped segments of a satsuma
  • 250g/9 oz/2 cups of shredded suet
  • 300g/10½ oz/1½ cups of dark brown sugar
  • 100g/3½ oz/1⅓ cups of chopped mixed peel
  • 1 teaspoon of mixed spice
  • 1 teaspoon of cinnamon
  • 1 teaspoon of nutmeg
  • 2 cooking apples, cored and chopped (they don’t need to be peeled)
  • 60g/2 oz/½ cup of blanched almonds, chopped

For the pastry:

  • 225g/8 oz/1 cup of cold butter, diced
  • 350g/12 oz/just under 3 cups of plain flour
  • 100g/3½ oz/½ cup of golden caster sugar
  • Pinch of salt
  • 2 eggs
  • Extra caster sugar, for dusting

Make it vegan: use vegetable suet instead of regular suet. Alternatively, freeze an equivalent amount of vegan butter for a few hours before shredding it into the mincemeat with a grater. Use vegan butter instead of butter in the pastry, and replace the egg with a flax egg.

Special Equipment

  • Two large mixing bowls
  • A 12 hole muffin tin
  • 10cm and 7cm round cookie cutters
  • A rolling pin
  • A food processer (optional)

Method

  1. Add the currants, raisins and brandy to a large mixing bowl, mix together until well combined, and cover the bowl. Allow the fruits to soak up the brandy for at least 4 hours, preferably overnight.
  2. Stir the lemon and satsuma zest, lemon juice, satsuma segments, candied peel, suet, sugar, spices, apple and almonds into the currants. Ensure that everything is thoroughly mixed together and cover the bowl again. Leave covered until needed.
  3. In a separate large mixing bowl, rub the flour and butter together until they resemble fine breadcrumbs, then stir in the sugar, salt and egg. (If desired combine them together in a food processor instead of by hand.)
  4. Continue kneading the pastry until it’s smooth, then roll it into a ball and pop it in the fridge. Chill for at least half an hour.
  5. Preheat the oven to 220°C/425°F/Gas Mark 7.
  6. Briefly knead the dough and roll it out on a floured surface until it’s just under half a centimetre thick. If it’s too crumbly, add a little water, and if it’s too wet, add a little flour.
  7. Use the 10cm cookie cutter to cut out 12 10cm circles of pastry, and press them into the muffin tray hollows. Dollop some mincemeat into each.
  8. Collect up the remaining pastry and reroll it. Use the 7cm cookie cutter to cut out pastry lids for the pies. Brush the edge of each pie with some beaten egg and press the lids onto each one so they are sealed. Make a small incision in each lid.
  9. Glaze the pies with a little more egg and sprinkle them with caster sugar.
  10. Bake the pies for 15-20 minutes, until golden, making sure to rotate them in the oven if needed. Allow them to cool slightly before removing them from the muffin trays with a knife- they should come away quite easily. Dust them with a little extra sugar. They can be eaten hot or cold.
  11. Bon Appetit!

Tips

  • Although you can use the mincemeat the day you make it, it will actually taste better if left for at least a week before it’s used.
  • The boozier the pies, the better they taste- so feel free to double the amount of brandy in the filling if you can. For a modern twist, try replacing it with dark rum.

Background

Pronunciation: (MintSs Piys)
Home: England
Relatives: Christmas Pudding, Apple Pie

History

Mince pies have been eaten for centuries but were very different in mediaeval times. Like many very old foods which are now sweet, they were initially much more savoury, with the ‘mincemeat’ in the pie containing actual meat. According to Gervase Markham’s 1615 recipe in The English Huswife, the filling should consist of a good quality leg of mutton (or beef or veal, if no mutton was available) along with meat suet, spices and raisins- but no sugar or sweetener.

Mediaeval pie crusts were known as ‘coffins’, as their function was often to provide a simple, edible base on which fruit or meat fillings were cooked, with the ‘pastry’ often thrown away afterwards. As such the pastry for Mince Pies would have been a single large, plain, unsweetened base for one pie and not a buttery, sugary base for multiple small pies. The strange combination of meat, spices and dried fruits- and indeed the inclusion of spices in itself- is believed to derive from Levantine cuisine, which was introduced to Europe by crusaders returning from the Holy Land.

Mince Pies’ association with Christmas perhaps began because dried fruit was a valued ingredient in midwinter- when fresh fruit was unavailable- or because the cost of the ingredients was such that Mince Pies were only made for feast days like Christmas. Because of this association, they were at one point more commonly known as ‘Christmas Pies’, and they were sometimes shaped into rectangular mangers, with effigies of baby Jesus placed on top. As a result, Mince Pies were- along with many other Christmas traditions- discouraged by Puritans during the Interregnum period (1649-1660.) They made a comeback after the Restoration, though their design was simplified.

By the Victorian era, the inclusion of meat was dying out: Mrs Beeston’s 1861 Household Management included two recipes, one with meat and one without. By the end of the 20th century, Mince Pies with meat was essentially unheard of, with only the inclusion of suet to remind us meat was ever included.

Imbuljuta tal-Qastan

Imbuljuta tal-Qastan is a traditional Maltese hot chocolate, which is flavoured with quintessentially Chistmassy ingredients and served after Midnight Mass and on New Year’s Eve.

Preparation time: 5 minutesSoaking time: 8 hours
Cooking time: 60 minutesServes: 4
Difficulty: Easy
Ingredients
  • 400g/14 oz/2 cups of peeled dried chestnuts
  • 200g/8 oz/1 cup of sugar
  • 100g/3½ oz/1 cup of cocoa powder
  • 100g/3½ oz/⅔ cups of chopped dark chocolate
  • 1 cinnamon stick
  • 6 cloves, ground
  • ½ teaspoon of nutmeg
  • 2 tablespoons of grated tangerine or mandarin rind
  • 3 tablespoons of cornstarch

Make it vegan: use a vegan cocoa like Cadbury’s Drinking Chocolate and ensure that the dark chocolate is dairy free.

Special Equipment

  • A large saucepan

Method

  1. Wash the chestnuts thoroughly, then soak them in water for a minimum of eight hours (preferably overnight).
  2. When ready, drain the chestnuts and add them to a saucepan along with 4 cups of water and all of the remaining ingredients except for the cornstarch. Put the pan on the hob over a medium-high heat and bring the mixture to the boil, then reduce the heat slightly. Allow it to simmer for an hour, or until the chestnuts are tender.
  3. Dissolve the cornstarch in a little water before stirring it thoroughly into the chocolate mixture.
  4. Pour the Imbuljuta into cups and serve hot.
  5. Gawdi!

Tips

  • If desired, try gently crushing the chestnuts after they have been cooked so that they release a bit more flavour. But don’t crush them too much, or you will end up with bits of chestnut floating about in the Imbuljuta.
  • Similarly, make sure you stir the cornflour and water together thoroughly before adding them to the rest of the ingredients, or you will end up with bits of undissolved cornflour in the drink.
  • To spruce up the Imbuljuta, add a large glass of red wine to the saucepan and cook it for an hour with the other ingredients before serving.

Background

Pronunciation: (Im-bul-yu-ta tal-kast-an)
Home:
Malta

Relatives: Cioccolata Calda (Italy), Chocolate Caliente (Spain), Vroča Čokolada (Slovenia)
History

Malta lies just south of Sicily and east of Tunisia. The archipelago is situated on several historical Mediterranean trade routes, and over the centuries has been conquered by the Phoenicians, Romans, Byzantines, Aghlabids, Norman Sicilians, Knights Hospitaller (consisting of knights from a range of European kingdoms), Aragonese, French and British. Having been influenced by so many different cultures Malta is vibrant and diverse. The country’s food has been strongly influenced by Sicilian, Arabic, Italian, British, Provençal, French and Spanish cuisines.

Most Maltese people are Catholic and Christmas is widely celebrated. Many attend midnight mass, after which a range of Christmassy sweet treats, including Imbuljuta tal-Qastan, are traditionally served. Imbuljuta tal-Qastan is perfect for the occasion- it’s hot and flavourful enough to warm people up on cold winter evenings, and its ingredients- chocolate, chestnuts, citrus fruits and spices- are quintessentially Christmassy.

Onion Bhajis

Onion Bhajis, also known as Pyaz Ke Pakode, are Indian spicy fritters which can be eaten as entrées, side dishes and snacks.

Preparation time: 15 minutesCooking time: 5 minutes
Serves: 10Difficulty: Easy

Ingredients

  • 2 onions, peeled, halved and thinly sliced
  • 1 teaspoon of chopped green chilli
  • 100g/3½ oz/⅔ cup of gram (chickpea) flour
  • ½ teaspoon of turmeric
  • ½ teaspoon of baking powder
  • ½ teaspoon of ground coriander
  • 1 tablespoon of finely chopped fresh coriander leaf
  • A pinch of salt
  • 120ml/1⅕dl/⅕ pt/½ cup of cold water
  • Vegetable oil, for deep frying

Special Equipment

  • A large mixing bowl
  • A sieve
  • A deep saucepan
  • A large slotted spoon

Method

  1. Soak the onion slices in water while you prepare the remaining ingredients.
  2. Sift the flour, turmeric, coriander and baking powder into a large mixing bowl, then stir in the coriander leaf, salt and chili. Drain the onion before adding it to the bowl and stirring it into the other ingredients.
  3. Pour half of the water into the bowl and stir everything together so a nice thick batter forms. If the batter seems too dry, add the rest of the water. Mix everything together thoroughly so the onions are well coated.
  4. Meanwhile, place a deep saucepan on the hob over a medium-high heat and fill it halfway with vegetable oil. Leave the oil to heat up for 5 minutes.
  5. Test the oil by dropping a little batter into the pan- if it rises to the surface and begins to brown, the oil is hot enough. Drop a few large spoonfuls of Bhaji mixture into the oil at a time and fry them for 3-4 minutes, or until they are golden brown. Then remove the Bhajis from the pan with a slotted spoon and drain them on kitchen paper.
  6. Keep the finished Bhajis in a warm place while you cook the rest- add more oil to the pan and allow it to heat up if needed. Then serve the Bhajis immediately while they are hot.
  7. Salavo!

Tips

  • You can eat Bhajis as a snack, as a first course, as a side dish, or with tea and coffee.

Background

Pronunciation: /ˈbɑːd͡ʒi/ (Bha-jee)
Home: India
Relatives: Other Bhajis (Aloo Bhaji, Bread Bhaji, Chilli Bhaji, Mirchi Bhaji), Pakora (Banana Pakora, Paneer Pakora), Samosa, Bhonda, Gota, Vada, Onion Rings, Tempura

History

A Bhaji (which means ‘fried vegetable’ in Hindi) is a kind of Pakora (which means ‘small cooked lump’ in Sanskrit). These fried snacks are a popular street food throughout the Indian Subcontinent, particularly in Kerala, Tamil Nadu, Maharashtra, Pradesh, Assam and West Bengal. They are believed to have originated in Gujarat, where they are traditionally eaten with Chai. Bhajis themselves are a particularly popular accompaniment to Indian meals around the world.

They’re widely eaten at Diwali, the Festival of Lights. Diwali is celebrated by Hindus, to whom it symbolizes the victory of light over darkness and good over evil, but is also very popular with Sikhs, Jains and Newar Buddhists. It’s held annually in October or November- the exact date depends on the lunar calendar- and this year is being held in mid November, with the main celebrations taking place on Saturday 14th.

During Diwali, people decorate their homes with rangoli patterns and diya lamps, set off fireworks, give out gifts and take part in feasts and parties. As people are so busy partaking in the festivities, small snacks like Bhajis- which can be grabbed and eaten on the go- are very popular.

Yorkshire Parkin

Parkin is a sticky oatmeal gingerbread cake which has been popular in northern England- particularly Yorkshire and Lancashire- for centuries.

Preparation time: 20 minutesCooking time: 1 hour
Required storage time: 2-5 daysServes: 10
Difficulty: Easy

Ingredients

  • 140g/5 oz/⅔ cups of butter, plus extra for greasing
  • 200g/7 oz/just under ⅔ cup of golden syrup
  • 100g/3½ oz/⅓ cup of black treacle
  • 120g/4 oz/⅔ cup of brown sugar
  • 200g/7 oz/1⅔ cups of self raising flour
  • 200g/7 oz/2¼ cups of oatmeal
  • 1 tablespoon of ground ginger
  • 1 teaspoon of nutmeg
  • ½ teaspoon of bicarbonate of soda
  • 2 eggs
  • 100ml/1dl/⅔ pt/just under ½ cup of milk

Make it vegan: use a plant based margarine instead of butter and 6 tablespoons of aquafaba instead of the eggs. Use soya, almond or oat milk instead of dairy milk.

Special Equipment

  • A pastry brush
  • A 20cm square cake tin
  • Baking paper
  • A large saucepan or casserole dish
  • A wooden spoon
  • An airtight container or cling film

Method

  1. Preheat the oven to 140°C/275°F/Gas Mark 1.
  2. Use a pastry brush to grease a large sheet of baking paper, then use the paper to line a 20cm cake tin.
  3. Add the sugar, butter, golden syrup and black treacle to a large saucepan and set it on the hob over a low heat. Leave the pan on the hob for a few minutes, stirring occasionally, until the butter has melted. Then remove the pan from the heat and leave its contents to cool down for a couple of minutes.
  4. Add the flour, oatmeal, ginger, nutmeg and bicarbonate of soda to the pan and stir them into the syrup mixture. Then stir in the egg and milk, making sure everything is mixed together thoroughly.
  5. Pour the mixture into the prepared cake tin and pop it in the oven. Bake for one hour, or until reasonably firm, then remove from the oven.
  6. Allow the Parkin to cool down, then transfer to an airtight container or wrap tightly with clingfilm. Leave the Parkin for at least two days- preferably five- before unwrapping, cutting into slices and serving.
  7. Bon Appetit!

Tips

  • Make sure the syrup mixture is reasonably cool before adding the eggs- if it’s too hot you might end up with bits of cooked egg in the Parkin.
  • The best way to weigh out the golden syrup and black treacle is to place the saucepan onto the scales, tare them, then slowly pour the syrups directly into the pan until you have the correct weight of each.
  • Don’t eat the Parkin the day you make it! Leave it in an airtight box for at least two days before eating- this process allows the Parkin to become soft and sticky.

Background

Pronunciation: (PAR-kin)
Home: Northern England
Relatives: Tharf Cake (Northern England), Gingerbread, Flapjacks
History

Parkin is a traditional gingerbread cake from Yorkshire and Lancashire. It’s made with oats, a staple crop in northern England. As these were historically abundant there and thus relatively inexpensive, Parkin became a popular regional food, affordable even for the very poor. We don’t know exactly how old Parkin is but it has certainly been eaten in Yorkshire for centuries: the oldest known official reference to Parkin was made in a court record from 1728, when a West Yorkshire woman was accused of stealing oatmeal to make it. A potentially much older reference comes from the ballad Arthur O’Bradley, which describes Parkin being eaten at a wedding in the time of Robin Hood.

Because Parkin is so old, it has changed a lot over the years. In the early modern period, when sweeteners were rare and most food was savoury, the names ‘Parkin’ and ‘Tharf Cake’ were used somewhat interchangeably; in later years, as sweeteners became more readily available, ‘Parkin’ was used to refer to a sweetened version of the savoury Tharf Cake. As industrialization progressed, Parkin was baked in ovens instead of on old fashioned griddles and open fires.

Because oatmeal is used to make Parkin, the cake is traditionally eaten in early November- just after the annual oat harvest. As a result, it has been associated with several winter festivals that are held at that time of year, many of which involve eating ritual cakes- these include Samhain, All Hallow’s Eve, Martinmas and Bonfire Night. Parkin even has its own special day, Parkin Sunday- the first Sunday in November.

Bonfire Night is perhaps the holiday most widely associated with Parkin today. It commemorates the failed Gunpowder Plot against Parliament on November 5th, 1605, and involves fireworks, bonfires, hot food, drinks and cakes. In Yorkshire, Parkin is still enjoyed by adults and children alike as they warm themselves around the communal bonfire. An article from The Times, written in 1857, suggests this tradition was already well established in the mid-nineteenth century:

‘A very old custom, coeval, apparently, with the annual bonfires and fireworks, prevails to this day in the West Riding of Yorkshire, of preparing against the anniversary of Gunpowder Plot, a kind of oatmeal gingerbread, if I may so call it, and religiously partaking of it on the “dreadful” day, and subsequently. The local name of the delicacy is Parkin, and it is usually seen in the form of massive loaves, substantial cakes, or bannocks.’ 

Pan de Muerto

Preparation time: 5 hoursCooking time: 40 minutes
Serves: 10Difficulty: Moderate

Pan de Muerto (Bread of the Dead) is a round Mexican sweet bread, decorated with boney phalange shaped pieces. It’s particularly popular in the run up to Día de Muertos (Day of the Dead), which is held on the 1st and 2nd of November.

Ingredients

  • 125ml/1¼ dl/¼ pint/½ cup of lukewarm milk, plus extra if needed
  • 14g/½ oz/4½ teaspoons of dry yeast
  • 500g/18 oz/4 cups of plain flour, plus extra if needed
  • 150g/5 oz/¾ cup of granulated sugar, plus extra for sprinkling
  • ½ teaspoon of sea salt
  • A teaspoon of ground aniseed
  • 3 large eggs, plus an extra egg for the egg wash
  • 2 tablespoon of orange zest or orange juice
  • 125g/4½ oz/½ cup of butter (at room temperature) plus 2 tablespoons of melted butter for the glaze

Make it vegan: use a plant based milk instead of dairy milk and a vegan butter or margarine instead of butter. Replace the eggs in the bread with 9 tablespoons of whisked up aquafaba, and brush the bread with a little extra aquafaba before baking.

Special Equipment

  • A large mixing bowl, plus an additional mixing bowl
  • A whisk
  • A baking tray
  • Baking paper
  • A pastry brush

Method

  1. Pour the lukewarm milk into a mixing bowl and sprinkle in the dry yeast. Leave it to sit for a few minutes before stirring in a tablespoon each of the flour and sugar.
  2. Mix together the remaining flour and sugar in a separate large mixing bowl and stir in the aniseed, orange zest and salt. Then add the three eggs and the yeast mixture and briefly stir everything together.
  3. Add the butter to the mixing bowl and rub it into the mixture with your fingers. Continue kneading with your fingers until it forms a smooth, springy dough that you can form into a ball- this will take about ten minutes. If after a few minutes of kneading the dough seems a little dry, knead in some milk and if it seems too wet, add some flour, before continuing to knead.
  4. Cover the bowl with a damp tea towel and leave it in a warm place for three hours, or until the dough has doubled in size.
  5. Line a baking tray with baking paper.
  6. Remove a quarter of the dough and roll it into knobbly bone shapes. Shape the remaining dough into a semi-sphere and place it onto the baking tray before pressing the ‘bones’ on top.
  7. Leave the dough to rise in a warm place for another hour. While it’s rising preheat the oven to 180°C/350°F/Gas Mark 4.
  8. Briefly whisk the remaining egg and brush the dough with it using a pastry brush, before popping it in the oven.
  9. Bake for approximately 40 minutes, or until the bread is nicely browned. Remove it from the oven, brush it with melted butter and liberally sprinkle with sugar.
  10. Allow to cool, then cut into wedges to serve.
  11. ¡Buen provecho!

Tips

  • Make sure you knead the dough for at least ten minutes so that it acquires the right texture- it should be soft and springy. Keep some extra milk and flour on standby: knead in a bit of extra milk if the dough seems too dry and a bit of extra flour if it’s too wet. If the dough hasn’t been kneaded enough or is too wet, it won’t retain its shape.
  • Keep an eye on the bread while it’s in the oven- rotate it once or twice while it’s baking to make sure it cooks evenly and reapply any leftover egg wash to parts of the bread that seem in danger of burning.
  • If desired, serve the Pan de Muerto with Champurrado or hot chocolate.

Background

Pronunciation: [pandeˈmwerto] (pann demwuertoh)
Home:
Mexico
Relatives:
Rosca de Reyes (Latin America, Spain), Conchas (Mexico), Pan Dulce de Elote (Mexico)

History

There are several theories about the origin of Pan de Muerto, whose decoration- strips of bread shaped into a cross of bones- could be derived from pre-Hispanic and/or Catholic theology. According to one theory, the bread derives from an ancient pre-Hispanic sacrificial ritual, wherein a priest would sacrifice a princess to the gods by cutting her heart out and biting into it immediately afterwards. In later years, when human sacrifice was no longer practiced, this ritual was changed and the priest would bite into a heart shaped piece of bread instead.

Another theory is that Pan de Muerto developed from the bread made to honour Huitzilopochtli, the Aztec god of war: this bread was shaped into the figure of the god and eaten by his devotees, just as Pan de Muerto is shaped into bones and eaten by people paying homage to the souls of the dead. It has also been suggested that Pan de Muerto may have been invented after the Spanish Conquest of the Aztec Empire by Spanish friars, who gave out bread decorated with imagery familiar to the indigenous population in an bid to entice them to Christianity.

Pan de Muerto is particularly associated with Día de Muertos (Day of the Dead), a celebration which draws on the Catholic All Saints Day as well as pre-Hispanic Aztec traditions for honouring the dead. It’s a warm, communal holiday where people fondly remember those they have lost. During the celebration families may build private altars to deceased loved ones and decorate them with offerings, photos and memorabilia: they may also visit graves to be near the souls of the dead, leaving toys for children who have passed on and alcoholic beverages for deceased adults. Feasting, drinking, dressing up and dancing are also popular activities, as is writing epitaphs for dead friends and family.

Day of the Dead Altar with Pan de Muerto
Eneas de Troya, Altardediademuertos, 2009
https://commons.wikimedia.org/wiki/File:Altardediademuertos.jpg (accessed 01/11/2020) [https://creativecommons.org/licenses/by/2.0/deed.en]

Pan de Muerto‘s boney, phalange-shaped decorations fit right in with the playfully macabre aesthetic of Día de Muertos. The bread is widely baked, sold, and eaten in the run up to the holiday, and during the celebration itself is left on altars and by gravesides for the souls of the dead.

Happy Halloween!

Here are some Halloween themed recipes from European Kitchen:

Barmbrack

Barmbrack is an Irish fruity tea loaf traditionally eaten at Samhain, an ancient Gaelic festival which inspired modern Halloween.

Recipe at: https://europeankitchen.org/2020/10/02/barmbrack/

Pumpkin Pie

Pumpkin Pie is a traditional American dessert. It’s a great way to use up leftover Halloween pumpkins!

Recipe at: https://europeankitchen.org/2020/10/23/pumpkin-pie/

Toffee Apples

Toffee (or Candy) Apples are an American confection which are very popular with trick or treaters at Halloween.

Recipe at: https://europeankitchen.org/2020/10/16/toffee-apples/

Stuffed Sugar Pumpkin

Stuffed Sugar Pumpkin is a Hidatsa dish eaten in autumn, and another great way to use up pumpkins!

Recipe at: https://europeankitchen.org/2020/10/09/stuffed-sugar-pumpkin/