Welcome to European Kitchen! A blog devoted to the delectable cuisines of Europe and beyond. My aims are to explore Europe’s diverse cultures, culinary histories, and cherished regional foods, make local dishes more accessible by providing authentic recipes, and go a little off the beaten track along the way!
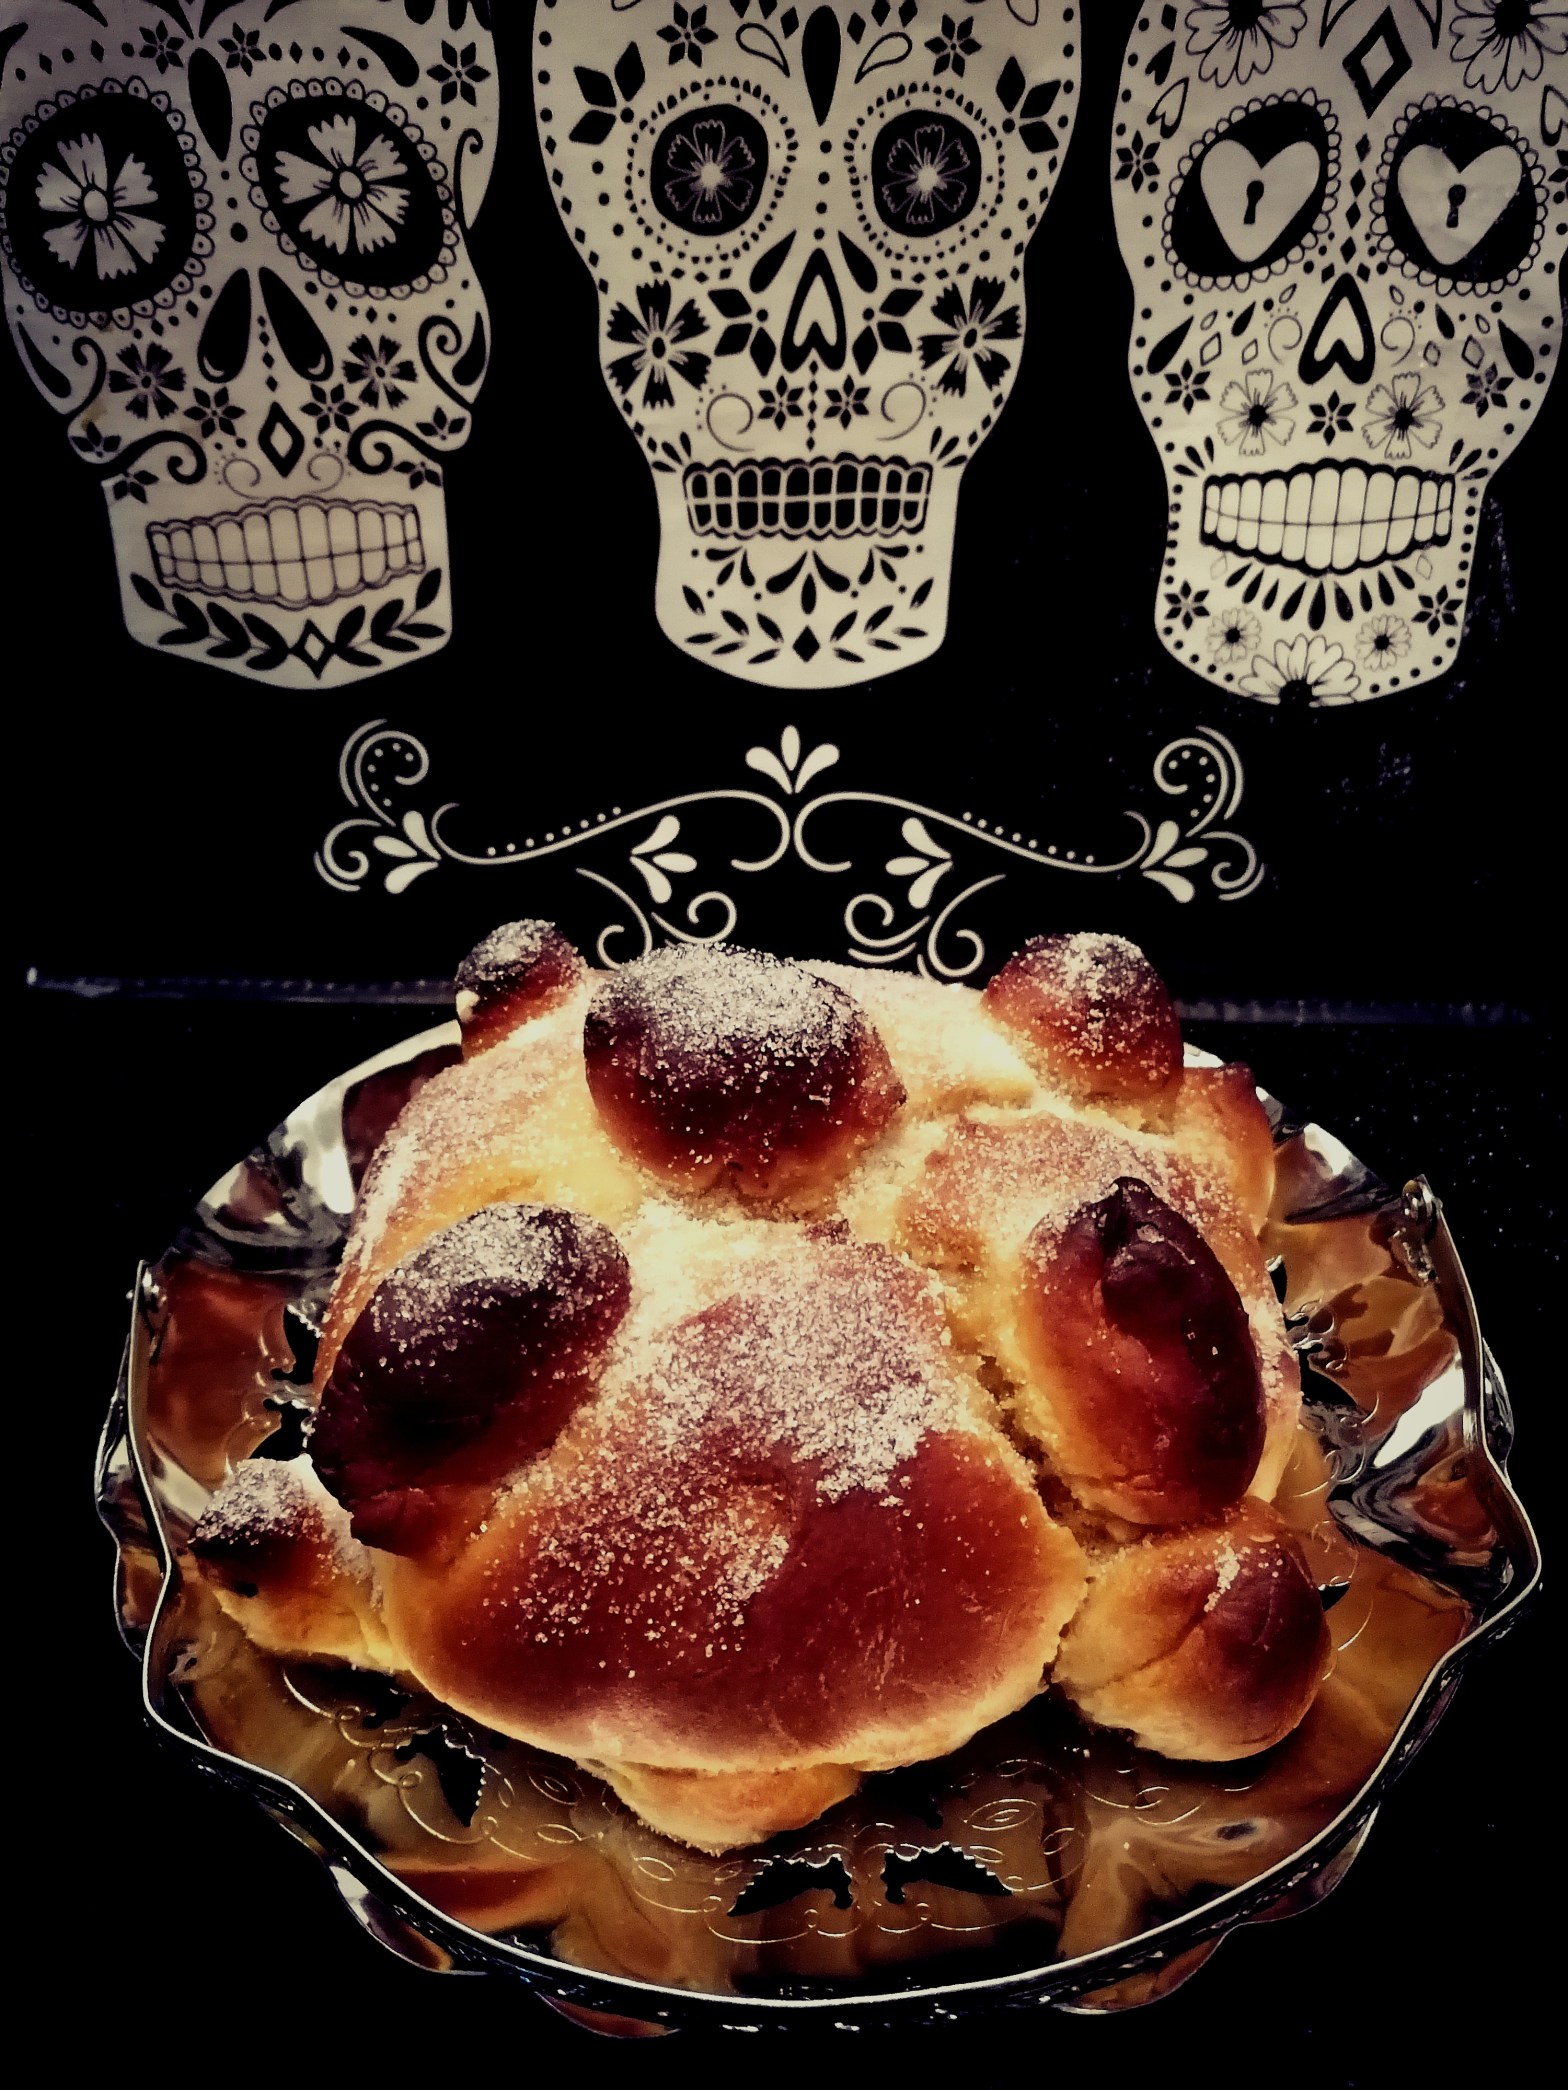
Pan de Muerto
| Preparation time: 5 hours | Cooking time: 40 minutes |
| Serves: 10 | Difficulty: Moderate |
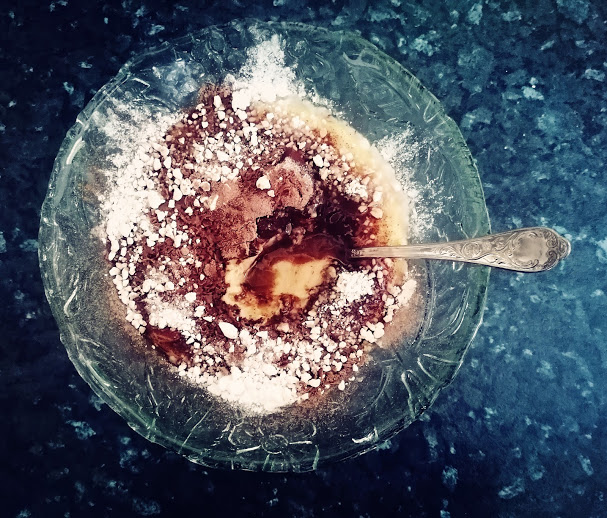
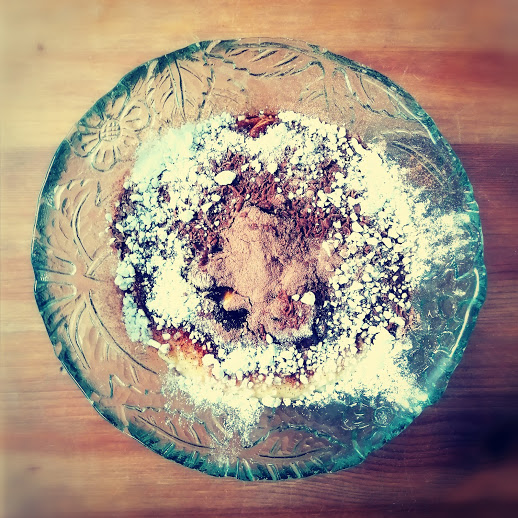
Happy Day of the Dead! Pan de Muerto (Bread of the Dead) is a round Mexican sweet bread, decorated with boney phalange shaped pieces. It’s particularly popular in the run up to Día de Muertos (Day of the Dead), which is held on the 1st and 2nd of November.
Ingredients
- 125ml/1¼ dl/¼ pint/½ cup of lukewarm milk, plus extra if needed
- 14g/½ oz/4½ teaspoons of dry yeast
- 500g/18 oz/4 cups of plain flour, plus extra if needed
- 150g/5 oz/¾ cup of granulated sugar, plus extra for sprinkling
- ½ teaspoon of sea salt
- A teaspoon of ground aniseed
- 3 large eggs, plus an extra egg for the egg wash
- 2 tablespoon of orange zest or orange juice
- 125g/4½ oz/½ cup of butter (at room temperature) plus 2 tablespoons of melted butter for the glaze
Make it vegan: use a plant based milk instead of dairy milk and a vegan butter or margarine instead of butter. Replace the eggs in the bread with 9 tablespoons of whisked up aquafaba, and brush the bread with a little extra aquafaba before baking.
Special Equipment
- A large mixing bowl, plus an additional mixing bowl
- A whisk
- A baking tray
- Baking paper
- A pastry brush
Method
- Pour the lukewarm milk into a mixing bowl and sprinkle in the dry yeast. Leave it to sit for a few minutes before stirring in a tablespoon each of the flour and sugar.
- Mix together the remaining flour and sugar in a separate large mixing bowl and stir in the aniseed, orange zest and salt. Then add the three eggs and the yeast mixture and briefly stir everything together.
- Add the butter to the mixing bowl and rub it into the mixture with your fingers. Continue kneading with your fingers until it forms a smooth, springy dough that you can form into a ball- this will take about ten minutes. If after a few minutes of kneading the dough seems a little dry, knead in some milk and if it seems too wet, add some flour, before continuing to knead.
- Cover the bowl with a damp tea towel and leave it in a warm place for three hours, or until the dough has doubled in size.
- Line a baking tray with baking paper.
- Remove a quarter of the dough and roll it into knobbly bone shapes. Shape the remaining dough into a semi-sphere and place it onto the baking tray before pressing the ‘bones’ on top.
- Leave the dough to rise in a warm place for another hour. While it’s rising preheat the oven to 180°C/350°F/Gas Mark 4.
- Briefly whisk the remaining egg and brush the dough with it using a pastry brush, before popping it in the oven.
- Bake for approximately 40 minutes, or until the bread is nicely browned. Remove it from the oven, brush it with melted butter and liberally sprinkle with sugar.
- Allow to cool, then cut into wedges to serve.
- ¡Buen provecho!
Tips
- Make sure you knead the dough for at least ten minutes so that it acquires the right texture- it should be soft and springy. Keep some extra milk and flour on standby: knead in a bit of extra milk if the dough seems too dry and a bit of extra flour if it’s too wet. If the dough hasn’t been kneaded enough or is too wet, it won’t retain its shape.
- Keep an eye on the bread while it’s in the oven- rotate it once or twice while it’s baking to make sure it cooks evenly and reapply any leftover egg wash to parts of the bread that seem in danger of burning.
- If desired, serve the Pan de Muerto with Champurrado or hot chocolate.


Background
Pronunciation: [pandeˈmwerto] (pann demwuertoh)
Home: Mexico
Relatives: Rosca de Reyes (Latin America, Spain), Conchas (Mexico), Pan Dulce de Elote (Mexico)
History
There are several theories about the origin of Pan de Muerto, whose decoration- strips of bread shaped into a cross of bones- could be derived from pre-Hispanic and/or Catholic theology. According to one theory, the bread derives from an ancient pre-Hispanic sacrificial ritual, wherein a priest would sacrifice a princess to the gods by cutting her heart out and biting into it immediately afterwards. In later years, when human sacrifice was no longer practiced, this ritual was changed and the priest would bite into a heart shaped piece of bread instead.
Another theory is that Pan de Muerto developed from the bread made to honour Huitzilopochtli, the Aztec god of war: this bread was shaped into the figure of the god and eaten by his devotees, just as Pan de Muerto is shaped into bones and eaten by people paying homage to the souls of the dead. It has also been suggested that Pan de Muerto may have been invented after the Spanish Conquest of the Aztec Empire by Spanish friars, who gave out bread decorated with imagery familiar to the indigenous population in an bid to entice them to Christianity.
Pan de Muerto is particularly associated with Día de Muertos (Day of the Dead), a celebration which draws on the Catholic All Saints Day as well as pre-Hispanic Aztec traditions for honouring the dead. It’s a warm, communal holiday where people fondly remember those they have lost. During the celebration families may build private altars to deceased loved ones and decorate them with offerings, photos and memorabilia: they may also visit graves to be near the souls of the dead, leaving toys for children who have passed on and alcoholic beverages for deceased adults. Feasting, drinking, dressing up and dancing are also popular activities, as is writing epitaphs for dead friends and family.

Eneas de Troya, Altardediademuertos, 2009
https://commons.wikimedia.org/wiki/File:Altardediademuertos.jpg (accessed 01/11/2020) [https://creativecommons.org/licenses/by/2.0/deed.en]
Pan de Muerto‘s boney, phalange-shaped decorations fit right in with the playfully macabre aesthetic of Día de Muertos. The bread is widely baked, sold, and eaten in the run up to the holiday, and during the celebration itself is left on altars and by gravesides for the souls of the dead.

Vegan Easter Babka

This light, sweet Polish bread is similar to brioche, and is traditionally eaten on Easter morning.
| Preparation time: 15 minutes | Cooking time: 40 minutes |
| Additional time: 2 hours + | Serves: 15 |
| Difficulty: Moderate |
Ingredients
- 3 tablespoons of lemon juice
- 160g/5½ oz/a cup of raisins
- 2 teaspoons of active dry yeast
- 3 tablespoons of ground flaxseed
- 140g/5oz/10 tablespoons of margarine, plus extra for greasing
- 150g/5oz/¾ cup of caster sugar
- A pinch of salt
- 240ml/2½ dl/½ pt/a cup of warm milk
- A teaspoon of vanilla extract
- A tablespoon of cornflour
- 500g/18oz/4 full cups of plain flour
- 125g/4½ oz/a cup of icing’ sugar
Special Equipment
- Two large mixing bowls
- Three small bowls
- A sieve
- A pastry brush
- A bundt or babka tin
- Cling film
- A serving plate
Method
- Put the raisins in a small bowl with the lemon juice. Top it up with a little water, so the raisins are covered with liquid. Set aside for an hour or two.
- Add the yeast to a seperate large mixing bowl and add ⅓ cup of warm water. Set aside for about 15 minutes, or until the yeast mixture begins to bubble a little.
- Add the flaxseed to a seperate small bowl and add 9 tablespoons of water. Mix together thoroughly and set aside for a few minutes.
- Use a pastry brush to grease the babka or bundt tin with some margarine.
- Add the sugar, margarine, salt, vanilla and milk to a seperate large mixing bowl and beat together thoroughly, then stir in the flaxseed and yeast mixtures.
- Sieve the flour and cornflour into the sugar mixture and beat everything together until very well combined, then add the raisin mixture and stir it in thoroughly.
- Pour the batter into the bundt or babka tin and cover with greased cling film.
- Leave the tin in a warm place for about an hour, or until the babka mixture has doubled in size. Meanwhile, preheat the oven to 180°C/350°F/Gas Mark 4.
- Remove the cling film and place the tin in the oven. Bake the babka for about 40-45 minutes or until it’s golden brown and cooked all the way through.
- Allow the babka to cool before inverting it onto a serving plate.
- Make the icing by sieving the icing sugar into a small bowl and adding a small amount of water. Stir together until smooth. Then gently spoon over the babka.
- Smacznego!
Tips
- Keep an eye on the babka while it’s rising- it’s ready when it’s risen to the height of the tin, but might overflow if left too long!
- To make the icing nice and thick, mix in the water slowly and gradually, so it doesn’t end up too thin and watery.

Background
Home: Poland
Pronunciation: /ˈbap.ka/ (baab-kuh)
Relatives: Panettone (Italy), Stollen (Germany)
History
Babka are cylindrical breads made at Easter in Poland, Ukraine and Belarus. The Polish version is very eggy, and is traditionally made before Easter Saturday and placed in a Święcone basket, along with painted eggs and meats. The basket is taken to church to be blessed by a priest, and its contents are eaten for breakfast the next day on Easter Sunday. This feast represents the end of Lent, when people are able to stop fasting and eat richer foods again!

Błażej Benisz, Święcone2007, 2007 https://commons.wikimedia.org/wiki/File:%C5%9Awi%C4%99cone2007.jpg [accessed 28th March 2021] (https://creativecommons.org/licenses/by-sa/2.5/deed.en)
Insalata di Sedano e Champignon

Insalata di Sedano e Champignon is a tasty, tangy, flavoursome salad which is quick and easy to make!
| Preparation time: 10 minutes | Serves: 4 (as a side) |
| Difficulty: Easy |
Ingredients
- 300g/10½ oz/3 cups of small mushrooms
- 5 stalks of celery, with leaves
- Juice of half a lemon
- A tablespoon of olive oil
- Freshly ground salt and pepper
- A tablespoon of fresh parsley
- Optional: pomegranate seeds, chopped tomatoes, shaved parmesan or gran padano, chopped walnuts, chives
Special Equipment
- A large serving bowl
Method
- Wash the mushrooms, celery and parsley, remove the ends of the celery, and slice each as finely as possible.
- Add the mushrooms, celery and parsley to a serving bowl and briefly toss everything together.
- Season the salad with salt and pepper. Add the olive oil and squeeze over the lemon juice before tossing the salad again. Add more olive oil, lemon juice or parsley according to taste.
- If using any of the optional ingredients, sprinkle them over the salad.
- Pop the salad bowl in the fridge for an hour, then serve.
- Buon Appetito!
Tips
- Serve with crusty bread for a light lunch, or as a side to pasta dishes.

Background
Home: Italy
Pronunciation: (In-sa-la-tah de se-dah-no eh cham-pee-gnon)
Relatives: Celery Salad, Warm Mushroom Salad

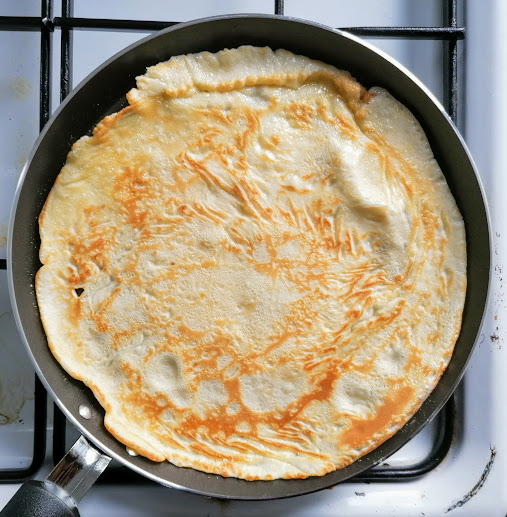
Vegan English Pancakes

These Shrove Tuesday pancakes are quick and easy to make and can be served with a wide variety of tasty toppings.
| Preparation time: 10 minutes | Cooking time: 10 minutes |
| Serves: 6 pancakes | Difficulty: Easy |
Ingredients
For the pancakes:
- 110g/4oz/1 cup of plain flour
- 2 tablespoons of ground flaxseed
- 300ml/3 dl/½ pint/just over a cup of milk
- A pinch of salt
- A tablespoon of plant based margarine
For toppings:
- Granulated sugar (optional)
- Lemon juice (optional)
- Vegan butter (optional)
- Vegan ice cream (optional)
- Vegan whipped cream (optional)
- Vegan chocolate spread (optional)
- Blueberries (optional)
- Jam (optional)
Special Equipment
- A large mixing bowl
- An electric whisk
- A sieve
- A frying pan
- A spatula
Method
- Mix the ground flaxseed with 6 tablespoons of water. Stir together thoroughly and set aside.
- Add the margarine to a non stick frying pan. Pop it on the hob over a medium heat.
- Meanwhile, sieve the flour into a mixing bowl. Use the electric whisk to whisk in the milk, flaxseed mixture and salt. Make sure the mixture is well combined and that there aren’t any lumps.
- Shake the melted margarine around the pan so there is an even coverage. Pour a sixth of the pancake mixture into the pan, and tilt the pan to spread it around.
- Allow the pancake to cook for about two minutes, then slide a spatula underneath it and ensure it’s lightly browned underneath. Ensure the pancake is dislodged with the spatula, and use the spatula to flip it over.
- Cook the over side of the pancake for a further minute.
- Flip the pancake onto a plate. Turn the oven on, onto a very low heat, and store the finished pancakes inside it to keep them warm while you cook the rest.
- Pour another sixth of the pancake mixture into the frying pan, tilt the pan to spread it. Repeat the cooking process until you have six pancakes.
- Serve the pancakes immediately, with lemon juice and sugar, ice cream, whipped cream, chocolate spread, or any combination of the above!
- Bon Appetit!
Tips
- If the pancakes brown too quickly or burn while cooking, turn the hob down slightly. Alternatively if they aren’t cooking quickly enough raise the temperature a bit.
- If the pancakes seem to be sticking to the pan a little too much, try whisking a little extra flour into the pancake mixture.
Background
Home: England
Relatives: Crêpes (France), American Pancakes (U.S.), Palatschinke (Austria), Pfannkuchen (Germany)
Vegan Moelleux au Chocolat
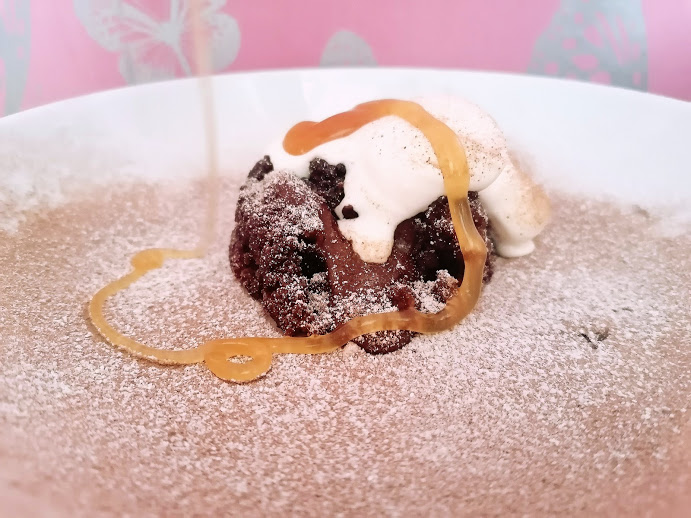
These tiny, gooey chocolate gateaus are served straight from the oven. Drizzle them with cream, ice cream and other goodies to make a rich yet elegant dessert.
| Preparation time: 40 minutes | Cooking time: 15 minutes |
| Serves: 4 | Difficulty: Moderate |
Ingredients
For the moelleux:
- 100g/3½ oz/⅔ cup of dairy free dark chocolate
- 100g/3½ oz/just under ½ cup of plant based margarine, plus extra for greasing
- 100g/3½ oz/½ cup of caster sugar
- 10 tablespoons of aquafaba
- 100g/3½ oz/⅞ cup of plain flour
- Cocoa powder
For decoration:
- Salted caramel sauce (optional)
- Ice cream (optional)
- Icing sugar (optional)
- Whipped plant based cream (optional)
Special equipment
- Four or five ramekins
- Two large mixing bowls
- A pastry brush
- A sieve
- A spatula
- An electric whisk
- A small saucepan
- A knife
- A baking tray
Method
- Use a pastry brush to brush the ramekins with margarine. Pop the ramekins in the freezer for fifteen minutes so the margarine freezes a little, then use the pastry brush to apply a second layer of margarine.
- Spoon a little cocoa powder into the ramekins and shake them about, so the margarine is covered with a thin coating of cocoa powder. Pour out any excess cocoa powder that hasn’t stuck to the margarine. Return the ramekins to the freezer.
- Set a saucepan over a medium heat and add 200ml water. Bring to a simmer.
- Add the chocolate and margarine to a heatproof mixing bowl and set it over the pan of water. Make sure the bowl isn’t touching the water. Leave the chocolate and margarine to heat up for a few minutes, until they have melted. Remove them from the heat and allow them to cool down a little.
- Pour the aquafaba into a separate clean mixing bowl and whisk it with an electric whisk until it’s pale and very foamy. Pour in the sugar and whisk for a few minutes more.
- Sift the flour into the aquafaba and add the melted chocolate and butter. Use a spatula to gently beat everything together until thoroughly combined.
- Pour the mixture into the ramekins and return them to the freezer for half an hour. Meanwhile, preheat the oven to 200°C/400°F/Gas Mark 6.
- When ready, place the ramekins on a baking tray and place them in the oven. Cook for ten to fifteen minutes, or until the moelleux have formed a crust and begun to pull away from the ramekins. Remove from the oven.
- Leave the moelleux for a minute or two, then use a knife to gently separate them from the ramekins. Place serving plates over the ramekins and gently invert both, shaking them up and down slightly to thoroughly dislodge the moelleux, before pulling away the ramekins.
- Sift a little icing sugar and/or cocoa powder over the moelleux, drizzle them with salted caramel sauce, and spoon over a little whipped cream or ice cream. Serve immediately.
- Bon Appetit!
Tips
- If you are making these as a dinner party dessert, it’s a good idea to double the quantity so you have a few extra moelleux. That way, when you think they’re nearly ready you can remove a ‘test’ moelleux from the oven and check that you’re able to invert it onto a serving plate without the outer crust collapsing.
Background
Pronunciation: (Molloo ochockoolah)
Home: France
Relatives: Petit gâteau (France), Death by Chocolate (U.S.), Soufflé (France)

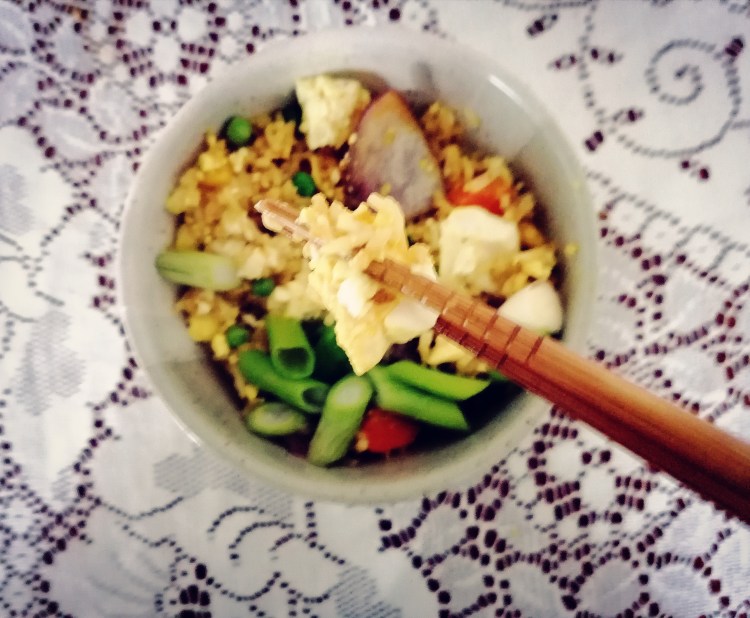
Tofu Fried Rice

This vegan version of restaurant style Chinese fried rice is easy to make but full of flavour!
| Preparation time: 20 minutes (plus a few hours for the rice to cool) | Cooking time: 20 minutes |
| Serves: 4 | Difficulty: Moderate |
Ingredients
- 200g/7 oz/1 cup of long grain or basmati rice
- 1 tablespoon of margarine
- 300g/10½ oz/1 box of silken tofu, undrained
- 1 teaspoon of turmeric
- 1 tablespoon of nutritional yeast
- Pinch of salt and pepper
- 2 tablespoons of sesame oil
- 1 onion
- 150g/5 oz/1 cup of mixed vegetables (sweetcorn, peas, chopped peppers, carrots, chillis etc.)
- 1 tablespoon of ginger, peeled and minced
- 1 tablespoon of soy sauce
- 2 spring onions, chopped
Special Equipment
- A saucepan
- A large wok
- A spatula
Method
- Boil or steam the rice according to package instructions. Then drain the rice thoroughly and leave it to cool in the fridge for at least 3 hours.
- Place a saucepan on the hob over a medium heat and add the margarine.
- When the margarine has melted add the undrained tofu to the pan and allow it to heat up for a few minutes. Then gently break it up into large chunks with a fork and mix in the salt, pepper, turmeric and nutritional yeast. Continue to cook for a few minutes more, stirring occasionally, before removing the pan from the heat.
- Pour the sesame oil into the wok and set it over a medium heat. Allow it to heat up for a minute or two before adding the vegetables and onion. Stir fry the vegetables for about five minutes, scraping them around the wok regularly with a spatula.
- Add the ginger and rice to the wok and mix them into the vegetables. Leave them to heat up for a minute or two, then use the spatula to roughly scrape them around the wok. Cook the rice and vegetables for a further five to ten minutes, scraping them regularly with the spatula as they cook so they don’t stick to the wok.
- Remove the wok from the heat and stir in the soy sauce and tofu.
- Pour the rice into bowls and sprinkle with the spring onions. Serve straight away.
- Chī hǎo hē hǎo! (吃好喝好)
Tips
- Make sure you steam and drain the rice at least a few hours in advance, and that it’s cold when you add it to the wok- if it’s still warm when you add it the fried rice will be unpleasantly mushy.

Background
Home: China
Relatives: This recipe is based on Yangzhou fried rice. Other kinds of Chinese fried rice include Hokkien, Canton, Szechwan and Chāhan.
History
Fried rice has been eaten in parts of China for at least 1500 years, and is believed to have become widely popular during the Ming dynasty (500 years ago). The dish incorporates old rice, vegetables and meats, as well as popular condiments like soy sauce, so probably developed as a way of using up leftovers.
The most popular variety of Chinese fried rice is Yangzhou rice. This is named after the city of Yangzhou in eastern central China. It consists of rice, pork, crab, egg, vegetables and spring onions, and is the version of fried rice which is usually served in international Chinese restaurants. But there are many other regional varieties of Chinese fried rice. These include Hokkien rice (fried rice with thick sauce poured over it), Szechwan rice (rice with spicy chilli sauce), Canton rice (rice with gravy) and Yuanyang rice (rice with Béchamel and tomato sauce).

Gisling, Si Qiao Yan Yu building on the Thin West Lake — 扬州瘦西湖四桥烟雨楼,, 2007, https://commons.wikimedia.org/wiki/File:Si_Qiao_Yan_Yu_Building.jpg [accessed 4th February 2021] (https://creativecommons.org/licenses/by-sa/1.0/deed.en)
Vegan Krupicová Kaše

Krupicová Kaše is a Czech porridge, consisting of milky semolina topped with copious amounts of butter, chocolate, cocoa powder and icing sugar. It can be eaten for breakfast or dessert and is also a popular baby food!
| Preparation time: 1 hour | Cooking time: 10 minutes |
| Serves: 2 | Difficulty: Easy |
Ingredients
For the porridge:
- 500ml/5dl/just under a pt/just over 2 cups of milk
- 50g/2 oz/4½ tablespoons of semolina
- A pinch of salt
For the topping:
- 30g/1 oz/2 tablespoons of plant based margarine
- 8g/¼ oz/a tablespoon of cocoa
- 10g/⅓ oz/a tablespoon of grated chocolate
- A pinch of cinnamon
- 16g/½ oz/2 tablespoons of icing sugar
Special Equipment
- A large mixing bowl
- A whisk
- A large saucepan
- A sieve
- Bowls, to serve
Method
- Pour the milk into a large mixing bowl with the salt and semolina. Briefly whisk everything together, then put the bowl in the fridge for an hour.
- Pour the milk mixture into a large saucepan. Place the pan on the hob over a low-medium heat and slowly bring it to the boil, stirring it very regularly with the whisk as it heats up so lumps don’t form.
- Allow it to simmer for five minutes, whisking constantly while it cooks.
- Remove the pan from the heat and beat in half of the margarine, making sure it’s been fully absorbed.
- Divide the porridge between two bowls.
- Top the bowls of porridge with the remaining butter. Then sieve the cocoa and cinnamon over the porridge before sprinkling over the grated chocolate and icing sugar.
- Dobrou chuť!
Tips
- Make sure you leave the semolina and milk to sit for an hour before cooking, and that you stir the mixture regularly when it’s heating up on the hob, so that lumps don’t form.
- You don’t have to stick to chocolate, cocoa and cinnamon as toppings- you can also try using rum, fresh or dried fruit, nuts, biscuits, honey, and/or lemon juice.
Background
Home: Czechia
Pronunciation: (Krupitsovah kashe)
Relatives: Krupicová kaša (Slovakia), Griș cu Lapte (Romania), Tejbegríz (Hungary), Manų Košė (Lithuania), Grießbrei (Germany), Semolina Pudding (UK), Vispipuuro (Finland), Guryev (Russia)
History
Porridge has been eaten for millennia, in various forms and in many different human societies. It’s believed cereals were first cultivated in Syria at least 9,000 years ago, and that they were soon being domesticated and harvested by multiple civilizations around the world. As a result porridge became an integral part many ancients peoples’ diets.
Semolina porridges and puddings are known to have been eaten in Europe since at least Roman times: an early recipe for semolina porridge was included in the Apicus, a collection of Roman recipes first compiled in the 1st century AD. The recipe calls for the semolina to be boiled with almonds and raisins and topped with nuts, fruits and cake crumbs.
Porridges are ubiquitous to central and eastern European cuisine today: the region boasts many different national and transnational varieties of buckwheat, wheat, barley, millet, rye and oat porridge. These include many versions of semolina porridge, which is popular in Czechia, Slovakia, Germany, Romania, Hungary, Lithuania and Russia. The Czech version, Krupicová Kaše, can be eaten for dessert or breakfast and is often fed to babies and toddlers.

Red Borscht

Red Borscht is a tasty sour soup from Ukraine. It consists of stewed beetroot, potatoes and vegetables, which are topped with herbs and copious amounts of sour cream.
| Preparation time: 30 minutes | Infusion time: At least 3 hours, preferably overnight |
| Cooking time: Just over 2 hours | Serves: 8 |
| Difficulty: Moderate |
Ingredients
For the broth:
- 3 litres/30 dl/5¼ pt/12½ cups of water
- 2 celery sticks, whole and uncut
- 3 bay leaves
- A pinch of salt and pepper
- A tablespoon of fresh parsley
For the soup:
- 90g/3 oz/½ cup of dried white beans, soaked for several hours
- 4 potatoes, peeled and cut into small chunks
- 2 tablespoons of sunflower oil
- 2 medium sized carrots, peeled and roughly grated
- 2 onions, peeled and roughly chopped
- 2 tablespoons of tomato purée
- 2 medium sized beets, peeled and finely grated
- A teaspoon of apple cider vinegar
- Half a head of white cabbage, finely chopped
For the topping:
- 1 tablespoon of fresh fennel, chopped
- 2 tablespoons of fresh parsley, chopped
- A teaspoon of paprika
- 50g/just under 2 oz/4 tablespoons of vegetable shortening
- 50g/just under 2 oz/3 full tablespoons of vegan butter or margarine
- 3 cloves of garlic, minced
- A pinch of salt and pepper
- Vegan sour cream (I used this recipe which worked well!)
- Extra parsley and fennel, for decoration
Special Equipment
- A sharp knife
- A chopping board
- A very large saucepan with a lid
- Two smaller saucepans or frying pans
- A wooden spoon
- A food processor
Method
- Add the water, whole celery stalks, bay leaves, tablespoon of parsley, salt and pepper to a large saucepan. Cover the pan with a lid, set it on the hob over a medium-high heat and bring to the boil. Lower the hob temperature down to low and allow the broth to simmer for an hour.
- Drain the beans and add them to the broth. Allow it to simmer for a further half hour.
- Raise the hob temperature up to medium. Remove the celery stalks from the pan and discard. Add the potatoes to the broth, re-cover the pan with the lid, and allow the broth to simmer for a further fifteen minutes.
- While the broth is simmering, set a separate pan over a medium heat and add half of the sunflower oil. Allow the oil to heat up for a minute or two, then add the onions and carrots. Sauté the vegetables for 5 minutes, stirring them regularly so they don’t burn. Then add the tomato purée to the pan and stir it into the onions and carrots. Allow them to cook for a couple of minutes more, stirring regularly, then remove the pan from the heat.
- Add the remaining sunflower oil to a separate pan and set it over a medium heat. Allow the oil to heat up for a minute or two, then add the beets and sprinkle them with apple cider vinegar. Sauté them for five minutes, stirring regularly, then remove the pan from the heat.
- When the potatoes have been cooking in the broth for fifteen minutes, add the sautéed onions, carrots and tomato purée to the pan. Stir everything together and re-cover the pan. Allow the broth to simmer for a further ten minutes.
- Finally, pour the cabbage and sautéed beetroot into the broth, stir everything together, re-cover the pan and allow the broth to simmer for a final five minutes before removing the pan from the heat.
- Add the fennel, parsley, paprika, vegetable shortening, butter, garlic, salt and pepper to a food processor and pulse until very well combined.
- Spoon the herb and vegetable shortening mixture over the broth and re-cover the pan with the lid. Leave the Borscht flavours to infuse for at least 3 hours, preferably overnight.
- When ready to eat, gently warm up the Borscht and ladle it into serving bowls. Spoon a little sour cream onto each bowl, top with fresh herbs, and serve.
- смачного! (Smačnóho!)
Tips
- If you don’t have a food processor, make sure the garlic, parsley and fennel are very finely chopped and that the shortening and butter are at room temperature. Use a wooden spoon to beat them together.
- Make sure you only simmer the Borscht for five minutes after you have added the beetroot and cabbage. This will allow the cabbage to remain relatively crisp and prevent the beetroot from losing its distinctive colour.
- You can use different vegetables and flavourings to those in this recipe if you prefer. This is only one of many Borscht recipes, as the dish varies by country, region, village and even by home. It’s said that no two housewives use the same Borscht recipe: all that’s required of proper Borscht is for it to be homemade.
- If you have time, try making some Pampushky (Ukrainian garlic doughnuts) to go with the Borscht.

Background
Home: Ukraine, Russia
Pronunciation: /bɔɹʃt/ (bawsht)
Relatives: Green and White Borscht (Ukraine, Russia, Poland), Shchi (Russia), Rassolnik (Russia), Solyanka (Russia and Ukraine), Jota (Slovenia), Żurek (Poland)
History
There are many, many varieties of Borscht, which can be grouped into three main types: red Borscht with beets, green Borscht with nettles and sorrel, and cold Borscht with milk and yoghurt. These soups are believed to all descend from a sour soup once eaten by the ancient Slavs. This sour soup was apparently made from common hogweed, which the Slavs picked, fermented and stewed.
Over time, hogweed was replaced by other vegetables and flavourings. Such flavourings varied greatly by region and by taste, and many different types of sour soup were referred to as Borscht. Elena Molokhovets’ A Gift to Young Housewives, a Russian cookbook published in 1861, includes nine different Russian recipes for Borscht, and there were many other types of Borscht eaten in Poland, Ukraine and other Slavic countries.
It’s believed that red Borscht made with beets originated in what is now Ukraine. Ukrainian soil was well suited to beet cultivation, and several nineteenth century Slavic cookbooks refer to red Borscht as ‘Little Russian Borscht‘- ‘Little Russian’ being a reference to Ukrainians. According to Ukrainian legend, the soup was invented by Ukranian Cossacks serving in the Polish army. Red Borscht is ubiquitous in Ukraine today: there are many very different regional varieties from Kiev, Chernihiv, Galicia, Polissya, Bukovyna, Vinnytsia and Crimea.
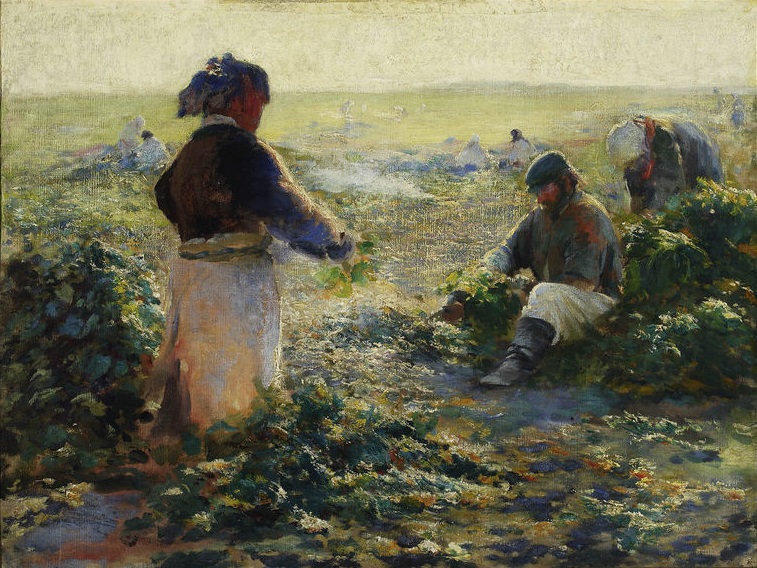
Leon Wyczółkowski, Kopanie buraków, 1893

Vegan Cauliflower Cheese

Cauliflower Cheese is a traditional, delicious side dish consisting of roast cauliflower in a rich, creamy Béchamel sauce, topped with copious amounts of crunchy cheese.
| Preparation time: 30 minutes | Cooking time: 20 minutes |
| Serves: 6 (as a side) | Difficulty: Easy |
Ingredients
- 840g/30 oz/1 large head of cauliflower, broken into florets with leaves removed
- 650ml/6½ dl/just over a pint/2¾ cups of unsweetened soya milk
- 40g/1½ oz/4 tablespoons of plain flour
- 60g/2 oz/4 tablespoons of plant based margarine
- A pinch of salt and pepper
- 80g/3 oz/6 tablespoons of grated vegan cheddar
- 40g/1½ oz/8 tablespoons of grated vegan parmesan
- 28g/1 oz/4 tablespoons of breadcrumbs
Special Equipment
- Two medium sized saucepans
- A colander
- A medium sized casserole dish
- A whisk
Method
- Set a saucepan of water on the hob over a high heat and bring to the boil. Add the cauliflower florets and boil them for 5 minutes, then remove the pan from the heat and drain the florets.
- Put the florets in the casserole dish and set aside.
- Preheat the oven to 220°C/425°F/Gas Mark 7.
- Next, make the Béchamel sauce. Add the margarine to another saucepan and set it on the hob over a medium heat. When the margarine has melted stir in the flour. Cook the margarine and flour together for up to five minutes, or until they form a smooth, golden brown roux. Ensure you stir them, gently but constantly, while they cook.
- Turn the heat down and whisk in a couple of tablespoons of the milk. Continue whisking the roux and milk together until the milk has been fully absorbed and a thick paste has formed. Continue adding the remainder of the milk, a couple of tablespoons at a time, whisking in each bit of milk until it’s been fully absorbed into the paste.
- Bring the sauce to a simmer, and allow it to simmer gently, whisking regularly, for 10 to 15 minutes, or until it’s become smooth and thick. Stir in a little salt and pepper.
- Mix the cheddar and parmesan together. Stir half of the cheese mixture into the sauce.
- Pour the Béchamel sauce evenly over the cauliflower, then stir the breadcrumbs and the remaining cheese mixture together and scatter them over the dish.
- Pop the Cauliflower Cheese in the oven and bake for about 20 minutes, or until it’s golden brown, bubbling and fragrant. Serve immediately, while it’s hot.
- Bon Appetit!
Tips
- If the Béchamel sauce ends up being a little lumpy, whisk it with an electric whisk or pop it in a blender- either should disperse any clumps of flour and leave you with a smooth sauce.
- If desired, you can add a little mustard and/or nutmeg to the sauce to flavour it.

Background
Home: Cyprus, England
Pronunciation:ˌ/kɒliflaʊə ˈtʃiːz/ (Koll-ih-flahw-err-cheeyz)
Relatives: Conopida Saseasca (Romania), Welsh Rarebit (Wales), Macaroni Cheese (International)
History
The history of Cauliflower Cheese isn’t too well documented. It’s believed that cauliflowers originated in Kythrea, Cyprus: the vegetable’s Cypriot heritage was reflected in its Old French and early modern English names, respectively Thou de Chypre and Cyprus Coleworts, which both mean ‘Cyprus Cabbage’. It’s believed that cauliflowers were introduced to western Europe in the Middle Ages by Latin Christians returning from the Lusignan Kingdom of Cyprus. The vegetable may also have been introduced to Britain directly in the 1800s, when Cyprus was a British colony.
Béchamel sauce became very popular in 19th century Cyprus and Greece, so it’s likely that Cauliflower Cheese originated in its complete form on the vegetable’s home island. The dish had emerged in British cuisine by the mid 19th century, with an early recipe of it appearing in Mrs Beeton’s Book of Household Management in 1861. By the 20th century it had become a popular side dish, often served as an accompaniment to Sunday roasts.

From Esme Scott Stevenson’s Our home in Cyprus. With illustrations and a map, 1880
Vegan Brioche des Rois

Happy Epiphany!
Brioche des Rois is a sweet, fruity, crown shaped brioche cake from Le Midi (southern France). It’s the Provençal version of the Galette des Rois, or King Cake. These cakes are eaten at Epiphany (6th January), which is the Christian feast of the revelation of Jesus.
| Preparation time: 30 minutes | Rising time: 2 hours |
| Cooking time: 30 minutes | Serves: 10 |
| Difficulty: Moderate |
Ingredients
For the dough:
- 250g/9 oz/2 cups of plain flour, plus extra
- 7g/¼ oz/just over 2 teaspoons of active dry yeast
- 2 tablespoons of lukewarm soya milk
- 6 tablespoons of aquafaba
- 50g/2 oz/4 tablespoons of sugar
- ½ teaspoon of salt
- 1 tablespoon of orange blossom water
- 80g/3 oz/⅜ cup of plant based margarine
For the ‘egg wash’:
- 2 tablespoons of soya milk
- 3 tablespoons of aquafaba
For decoration:
- 2 tablespoons of apricot jam
- 3 tablespoons of sugar pearls (see tips)
- 200g/7 oz/a cup of candied fruit (see tips)
Special Equipment
- A large mixing bowl
- A sieve
- A tea towel
- A large baking tray
- Baking paper
- A pastry brush
- A saucepan
- A wooden spoon
Method
- Add the yeast and flour to a large mixing bowl and briefly mix them together with a wooden spoon.
- Next, add the lukewarm milk, sugar, salt, 6 tablespoons of aquafaba, orange blossom water and margarine to the bowl. Use your fingers to knead everything together until well combined into a sticky ball. Then transfer the dough to a floured surfaced and knead for approximately ten minutes, or until the dough is smooth, springy and no longer sticky.
- Return the dough to the bowl. Cover the bowl with a wet tea towel and leave it in a warm place for an hour, so the dough can rise.
- Meanwhile, line a baking tray with a baking sheet.
- Uncover the bowl and return the dough to the lightly floured surface. Knead it very briefly before using your fingers to roll it out into a long sausage (about 40cm long). Bring the ends of the sausage together so the dough forms a ring. Set it on down the baking paper and re-cover with the tea towel. Leave it in a warm place for a further hour.
- While it’s rising, preheat the oven to 180°C/350°F/Gas Mark 4.
- Uncover the dough. Briefly mix the remaining aquafaba and milk together to make an ‘egg wash’ and use a pastry brush to dab it over the dough. Pop the dough in the oven and bake for about 30 minutes, or until golden- if necessary, rotate it in the oven half way through cooking time and dab it with a little more ‘egg wash’ to prevent it from burning. Remove from the oven when ready.
- While it’s cooling, pop the apricot jam and a tablespoon of water into a saucepan and warm it over a low heat for a couple of minutes. Briefly stir the jam mixture, then brush it over the brioche using the pastry brush.
- Allow the brioche and jam to cool for a few minutes, then decorate with sugar pearls and candied fruit. When ready, cut into slices and serve.
- Bon Appetit!
Tips
- If desired, you can use sugar syrup, corn syrup, marmalade or agave syrup for the glaze instead of apricot jam
- Pearls of sugar are widely available in France for pastry decoration but aren’t that common in many countries. If you can’t get hold of them, they can be substituted with lightly crushed sugar cubes.
- Most French recipes call for fresh yeast, which also isn’t always easily accessible. If you’re able to get hold of fresh yeast, use 10g instead of the dry active yeast.
- If desired, you can make your own candied fruit. Cut your chosen fruit into slices and wash them. Pour a cup of water and a cup of sugar into a very clean saucepan with a drop of lemon juice and bring to a simmer. Add the fruit to the pan and allow it to simmer for an hour, then remove the pan from the heat and leave the fruit in the pan for a few hours. When ready, rremove the fruit from the pan and leave it to dry before using it to decorate the Brioche. You can then use the syrup to flavour drinks and ice cream!

Background
Home: Provence, Occitania, Roussillon (France), Romandy (Switzerland)
Pronunciation: /bʁi.jɔʃ de ʁwa/ (bree-osh de rrhwa)
Relatives: Galette des Rois (Northern France), Dreikönigskuchen (Germany), Bolo-Rei (Portugal), Roscón de Reyes (Spain), Rosca de Reyes (Latin America), Koningentaart (Belgium), King Cake (Louisiana, U.S.)
History
Epiphany is a Christian feast day which directly follows Twelfth Night, and is the celebration of the revelation of Jesus. Eastern Christians celebrate it by commemorating Jesus’ baptism in the River Jordan by John the Baptist, while Western Christians commemorate the visit of the Magi (the Three Kings, or Wise Men) to baby Jesus: both events represent Jesus’ physical manifestation to the world and the people living in it.
King Cakes are eaten at Epiphany in numerous countries that follow Western Christian traditions. There are many national and regional varieties of King Cake (see ‘relatives’): Brioche des Rois (Kings’ Brioche) is the Provençal version. The cakes are named after the Three Kings whose visit to baby Jesus is being celebrated, and most versions are shaped into a hollow circle and decorated with candied fruit so that they look like a king’s crown. A notable exception is the northern French Galette des Rois, which is solid and not hollow: the southern French brioche is shaped and decorated more similarly to the Spanish Roscón de Reyes and Portuguese Bolo-Rei than to it’s northern relative.
It’s traditional in many countries to hide either a bean or figurine in the King Cake: whoever finds it is declared king or queen of the feast and given a crown to wear!
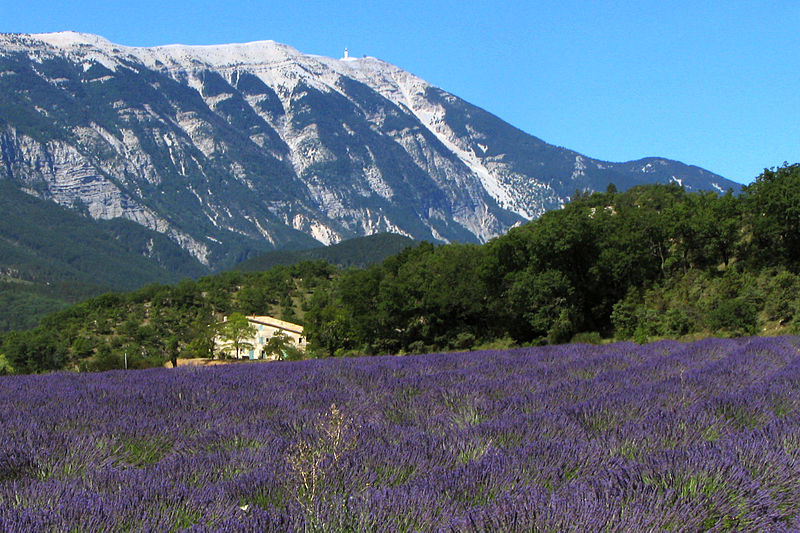
Robert Brink, Lavender field and Mont Ventoux, 2005
https://commons.wikimedia.org/wiki/File:Lavender_field_and_Mont_Ventoux.jpg [accessed 06/01/2021] (https://en.wikipedia.org/wiki/GNU_Free_Documentation_License)

You must be logged in to post a comment.